Wolf's Motorhome Modifications
... and Other Stuff
Defeating the Auto Parking Brake (welcome to our nightmare)
AND installing a "Brake Not Applied" alarm
Remember you can click on a picture for a larger image!\
NOTE: THIS IS A 1997 CHEVY P-30 CHASSIS
Defeating the auto brake
I defeated my automatically applied parking brake after it began failing and showed problems in both the pump and actuator. These are very expensive items. Other owner's experiences showed the rebuilds will again fail. I still had the pedal applied parking brake in operation. I can use that in place of the automatically applied brake. If I didn't put some sort of alarm system on the brake, I might walk away from the motorhome after putting it in park and forget to apply the pedal parking brake. For this reason I designed an alarm that reminding me to turn on the pedal applied parking brake. I extended that to alarm should I attempt to drive away with the parking brake still applied.
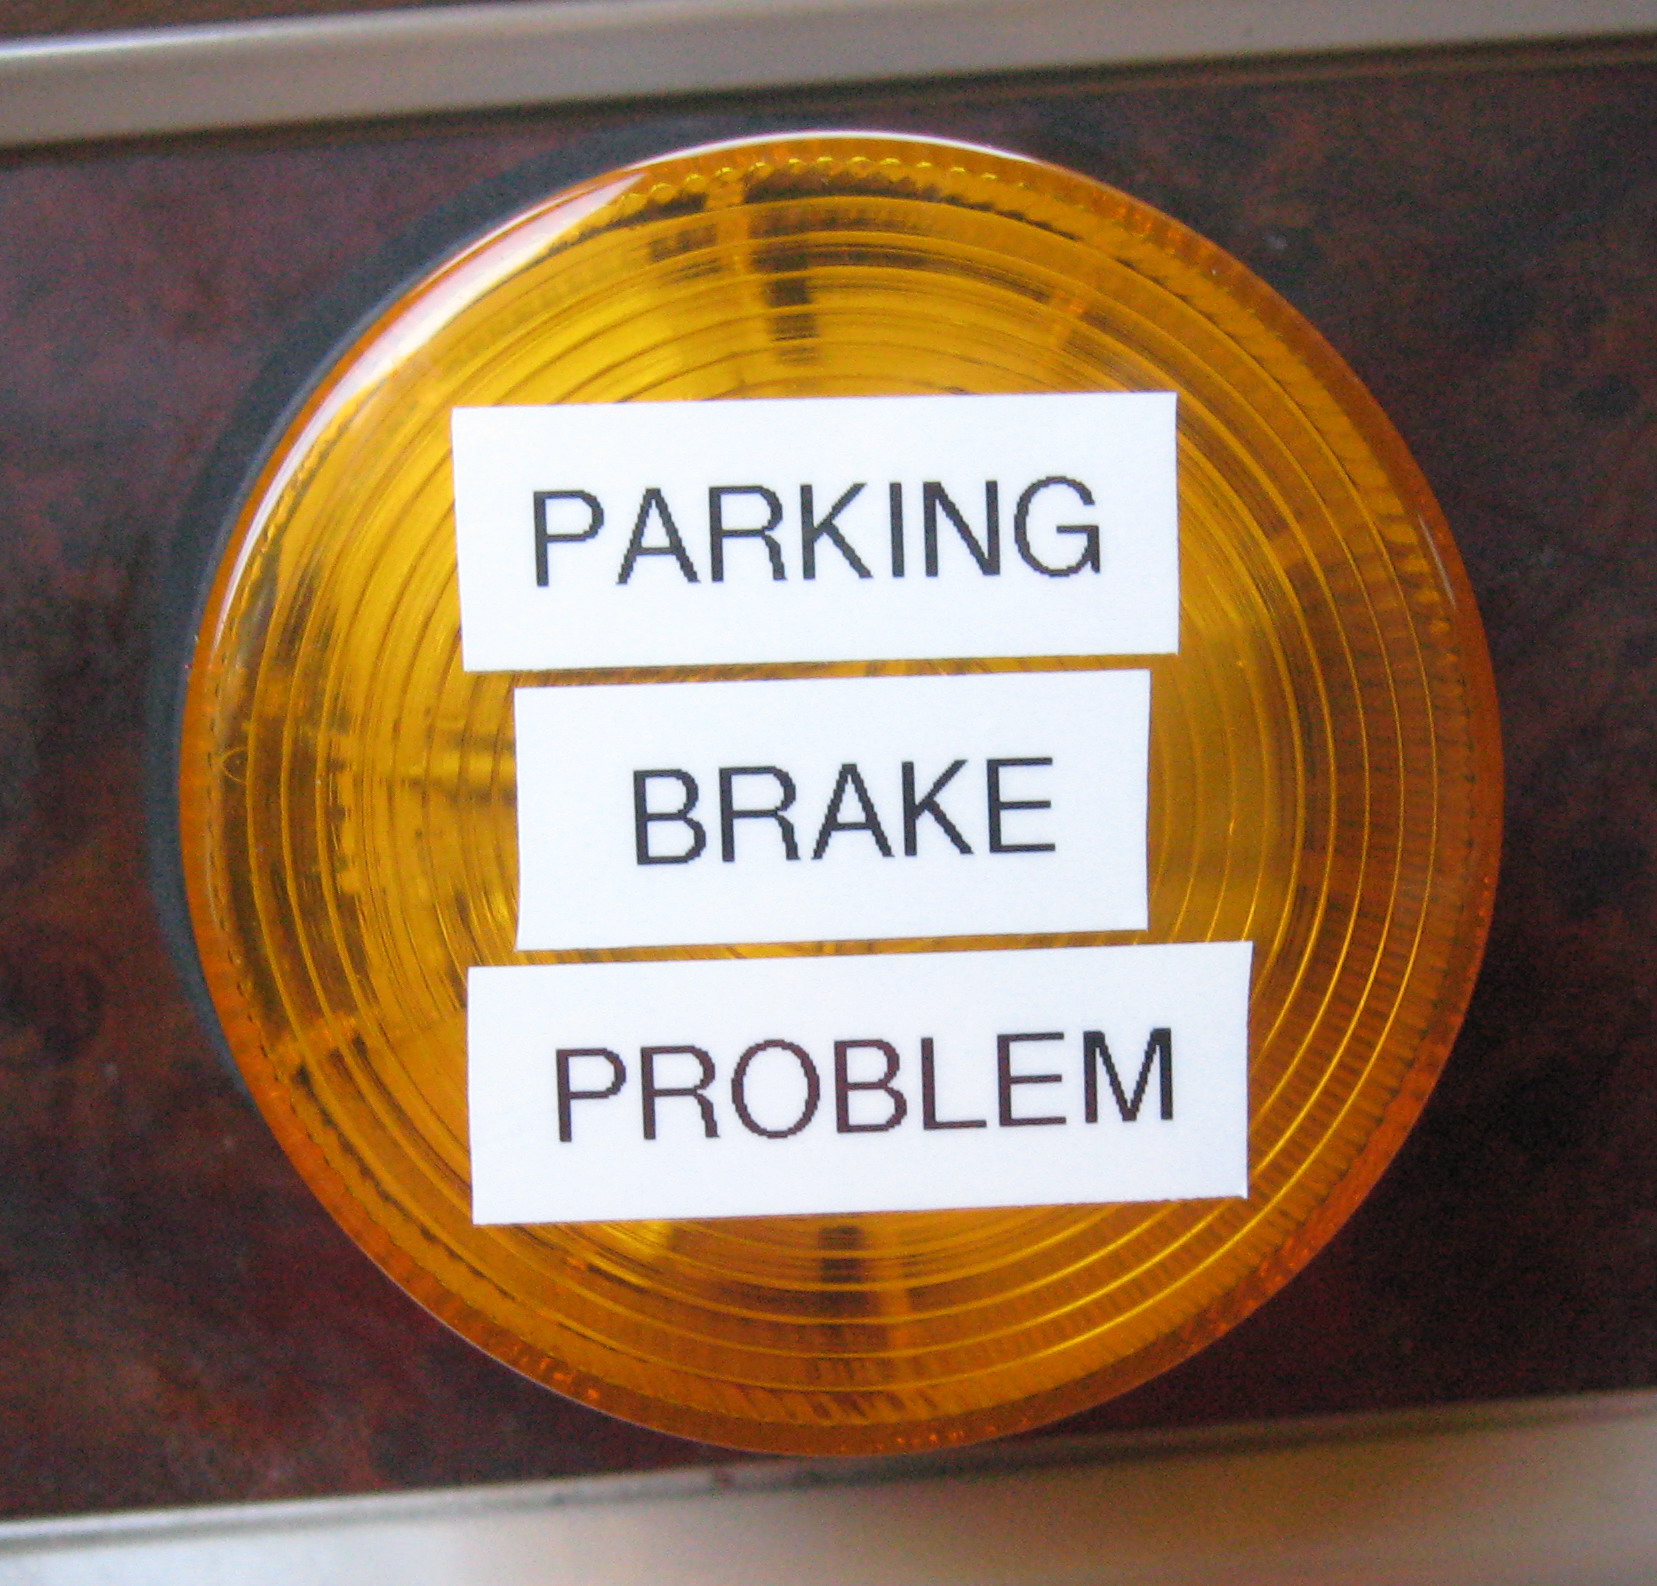
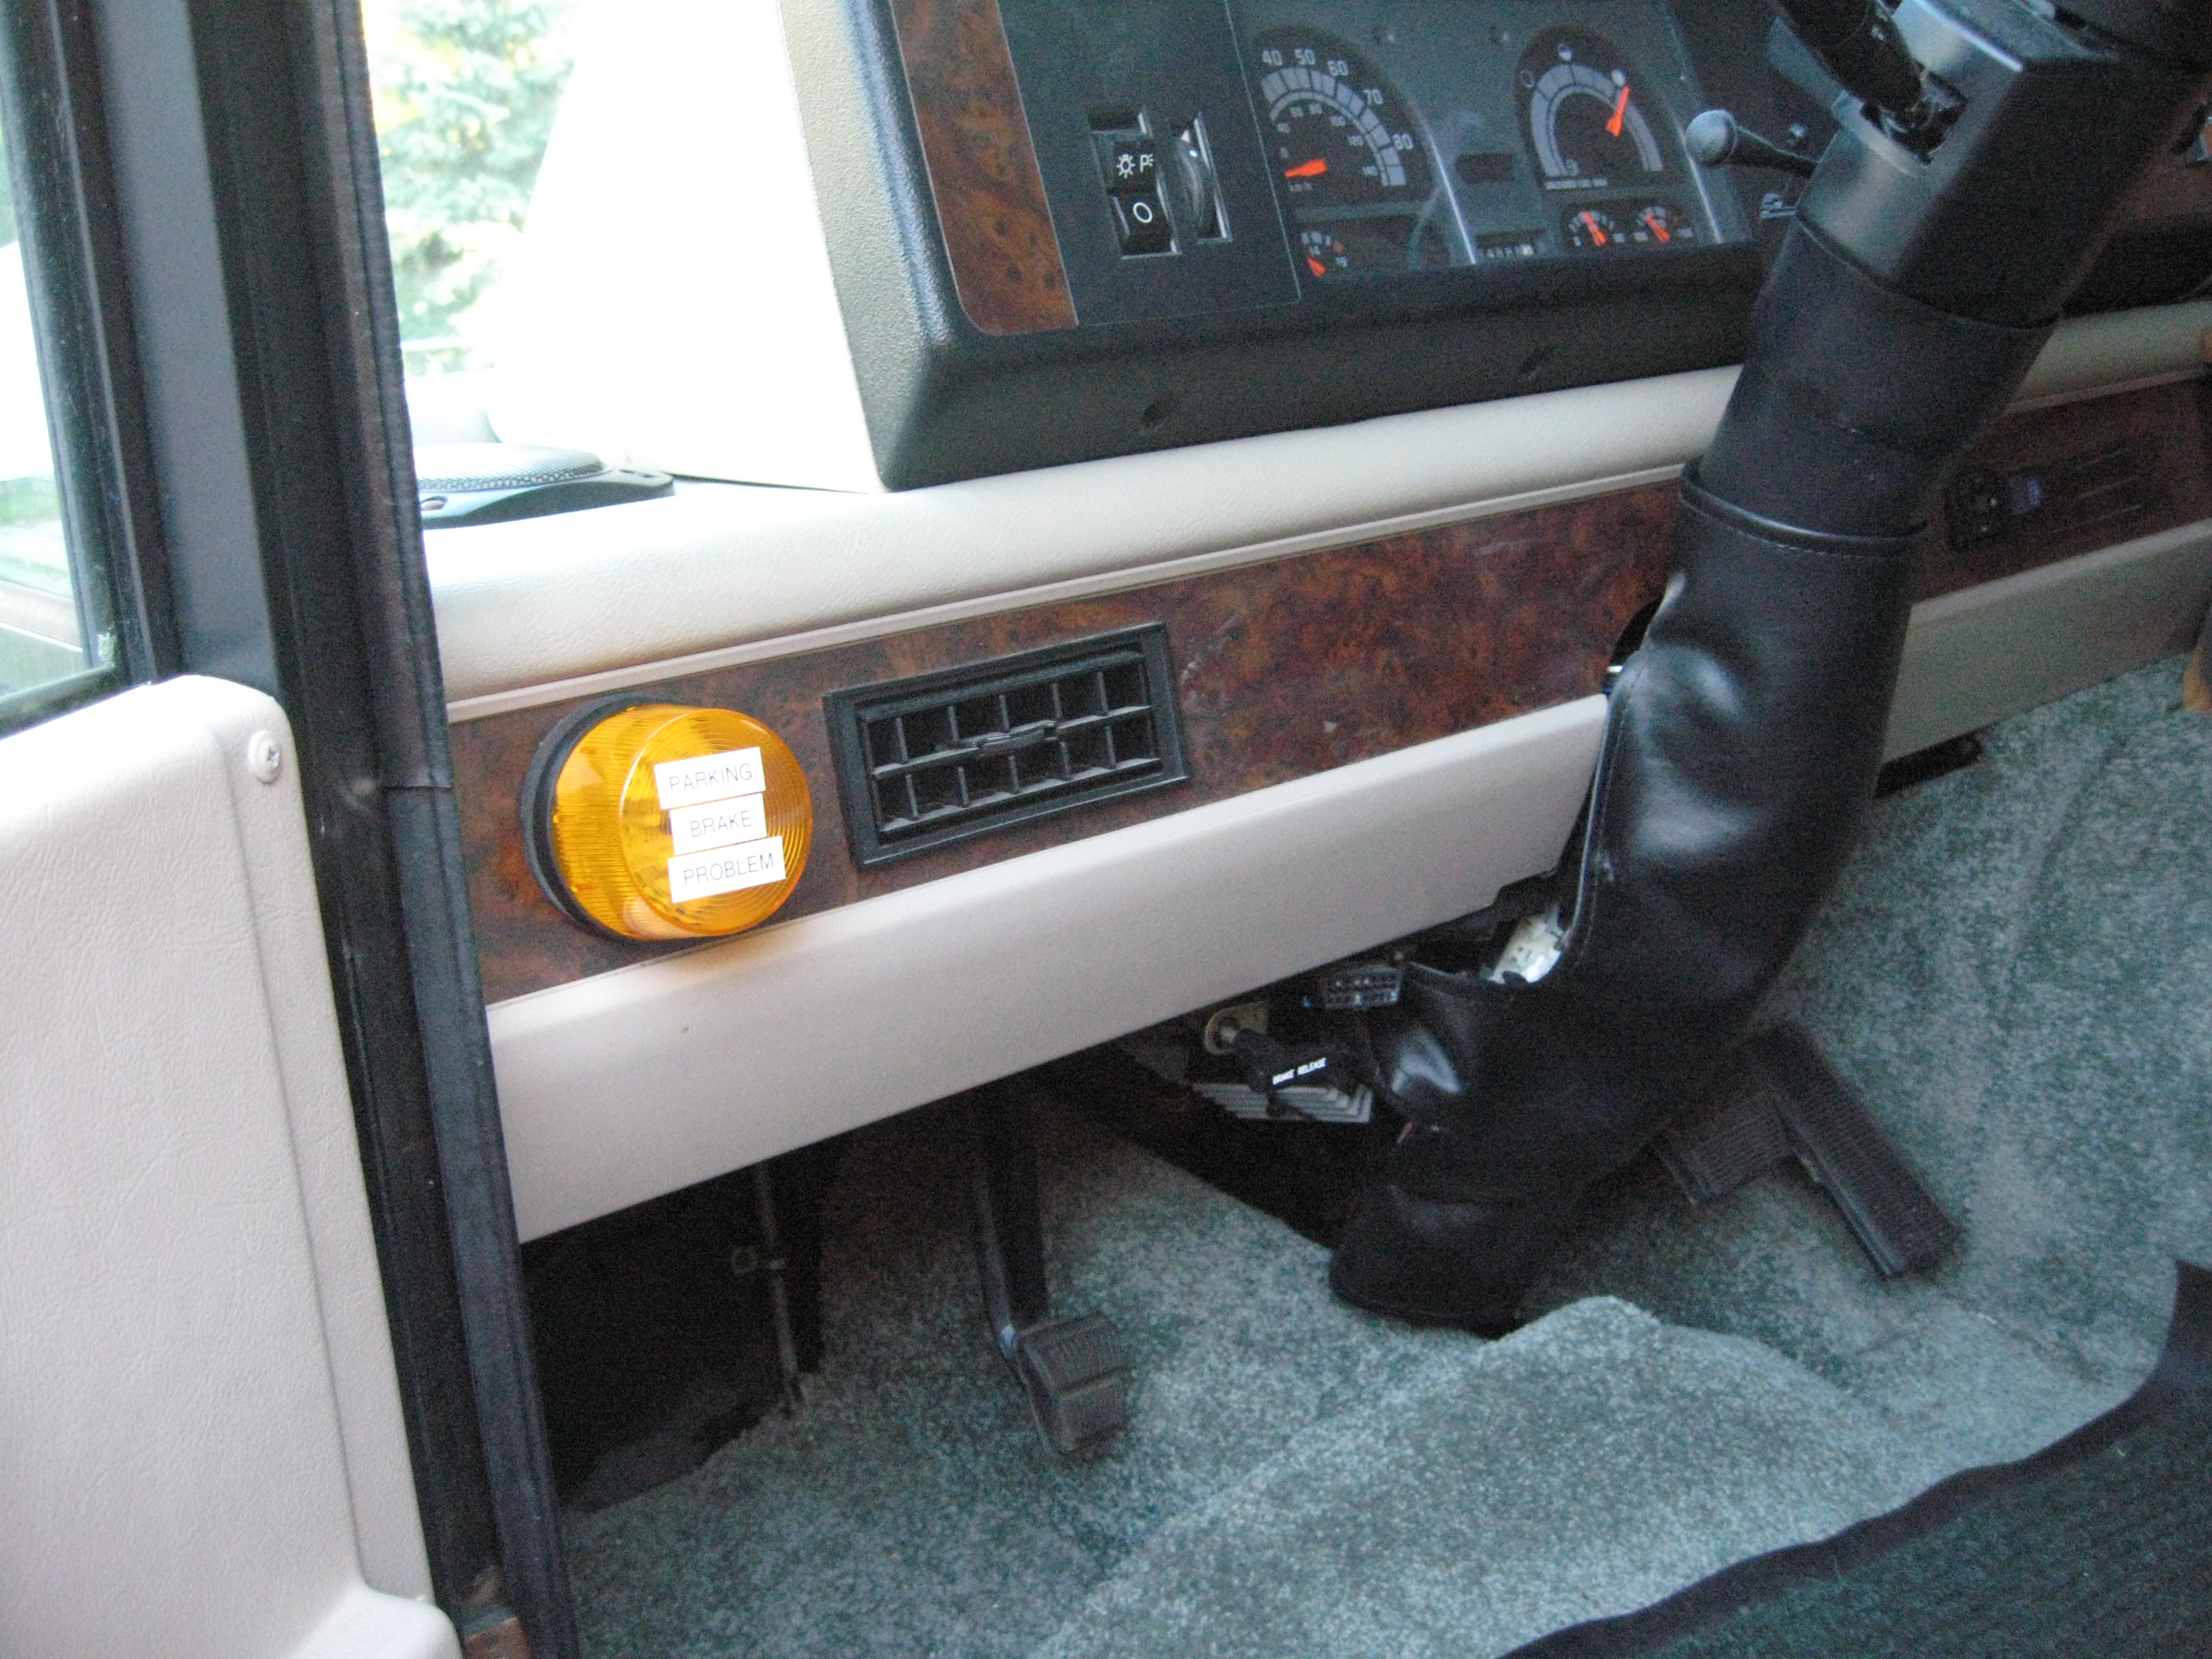
My alarm is composed of a 90 dB pulsating Sonalert alarm and a yellow strobe light with the words "PARKING BRAKE PROBLEM" applied to it.
If you believe that a 90 dB pulsating Sonalert and the yellow strobe won't clue you into a problem and the words "PARKING BRAKE PROBLEM" on the strobe isn't enough of a hint, hire someone to fix your automatically applied parking brake. This work is not for you.
How the Chevrolet or Workhorse parking brake works
When the transmission selector is in "park", the parking brake is applied. The parking brake is a drum brake located on the back of the transmission. The brake is applied two ways. First, one might press the parking brake pedal. The other way is the dreaded auto parking brake mechanism. If your motorhome is locked up, welcome to our nightmare!!!
First things first
Get yourself a service manual. If you don't have a service manual, don't waste everyone's time with dopey questions easily understood by a close reading from the people that brought you your problem. BUY A SERVICE MANUAL. It will pay for itself many times over. For my 1997 Chevy P-30 chassis, the operative pages are 5F-1 to 5F1-12.
Failure
Failure comes in two flavors. First, something catastrophic happens and the brake is applied stopping the rig. Life sucks. Another flavor is when pressure is lost in the system and the pump cycles on and off, flashing the auto park brake light. This means your life does not yet suck. God loves you and has given you a short reprieve. How you use your time is your choice. Personally, I'd fix the brake. I'd fix it NOW.
Flavor two offers a problem. What part failed? Unless you have fluid dripping out of a connection, you are in a pickle. You have to throw each solution at the problem and see what makes the problem go away.
How do I defeat a broken auto parking brake?
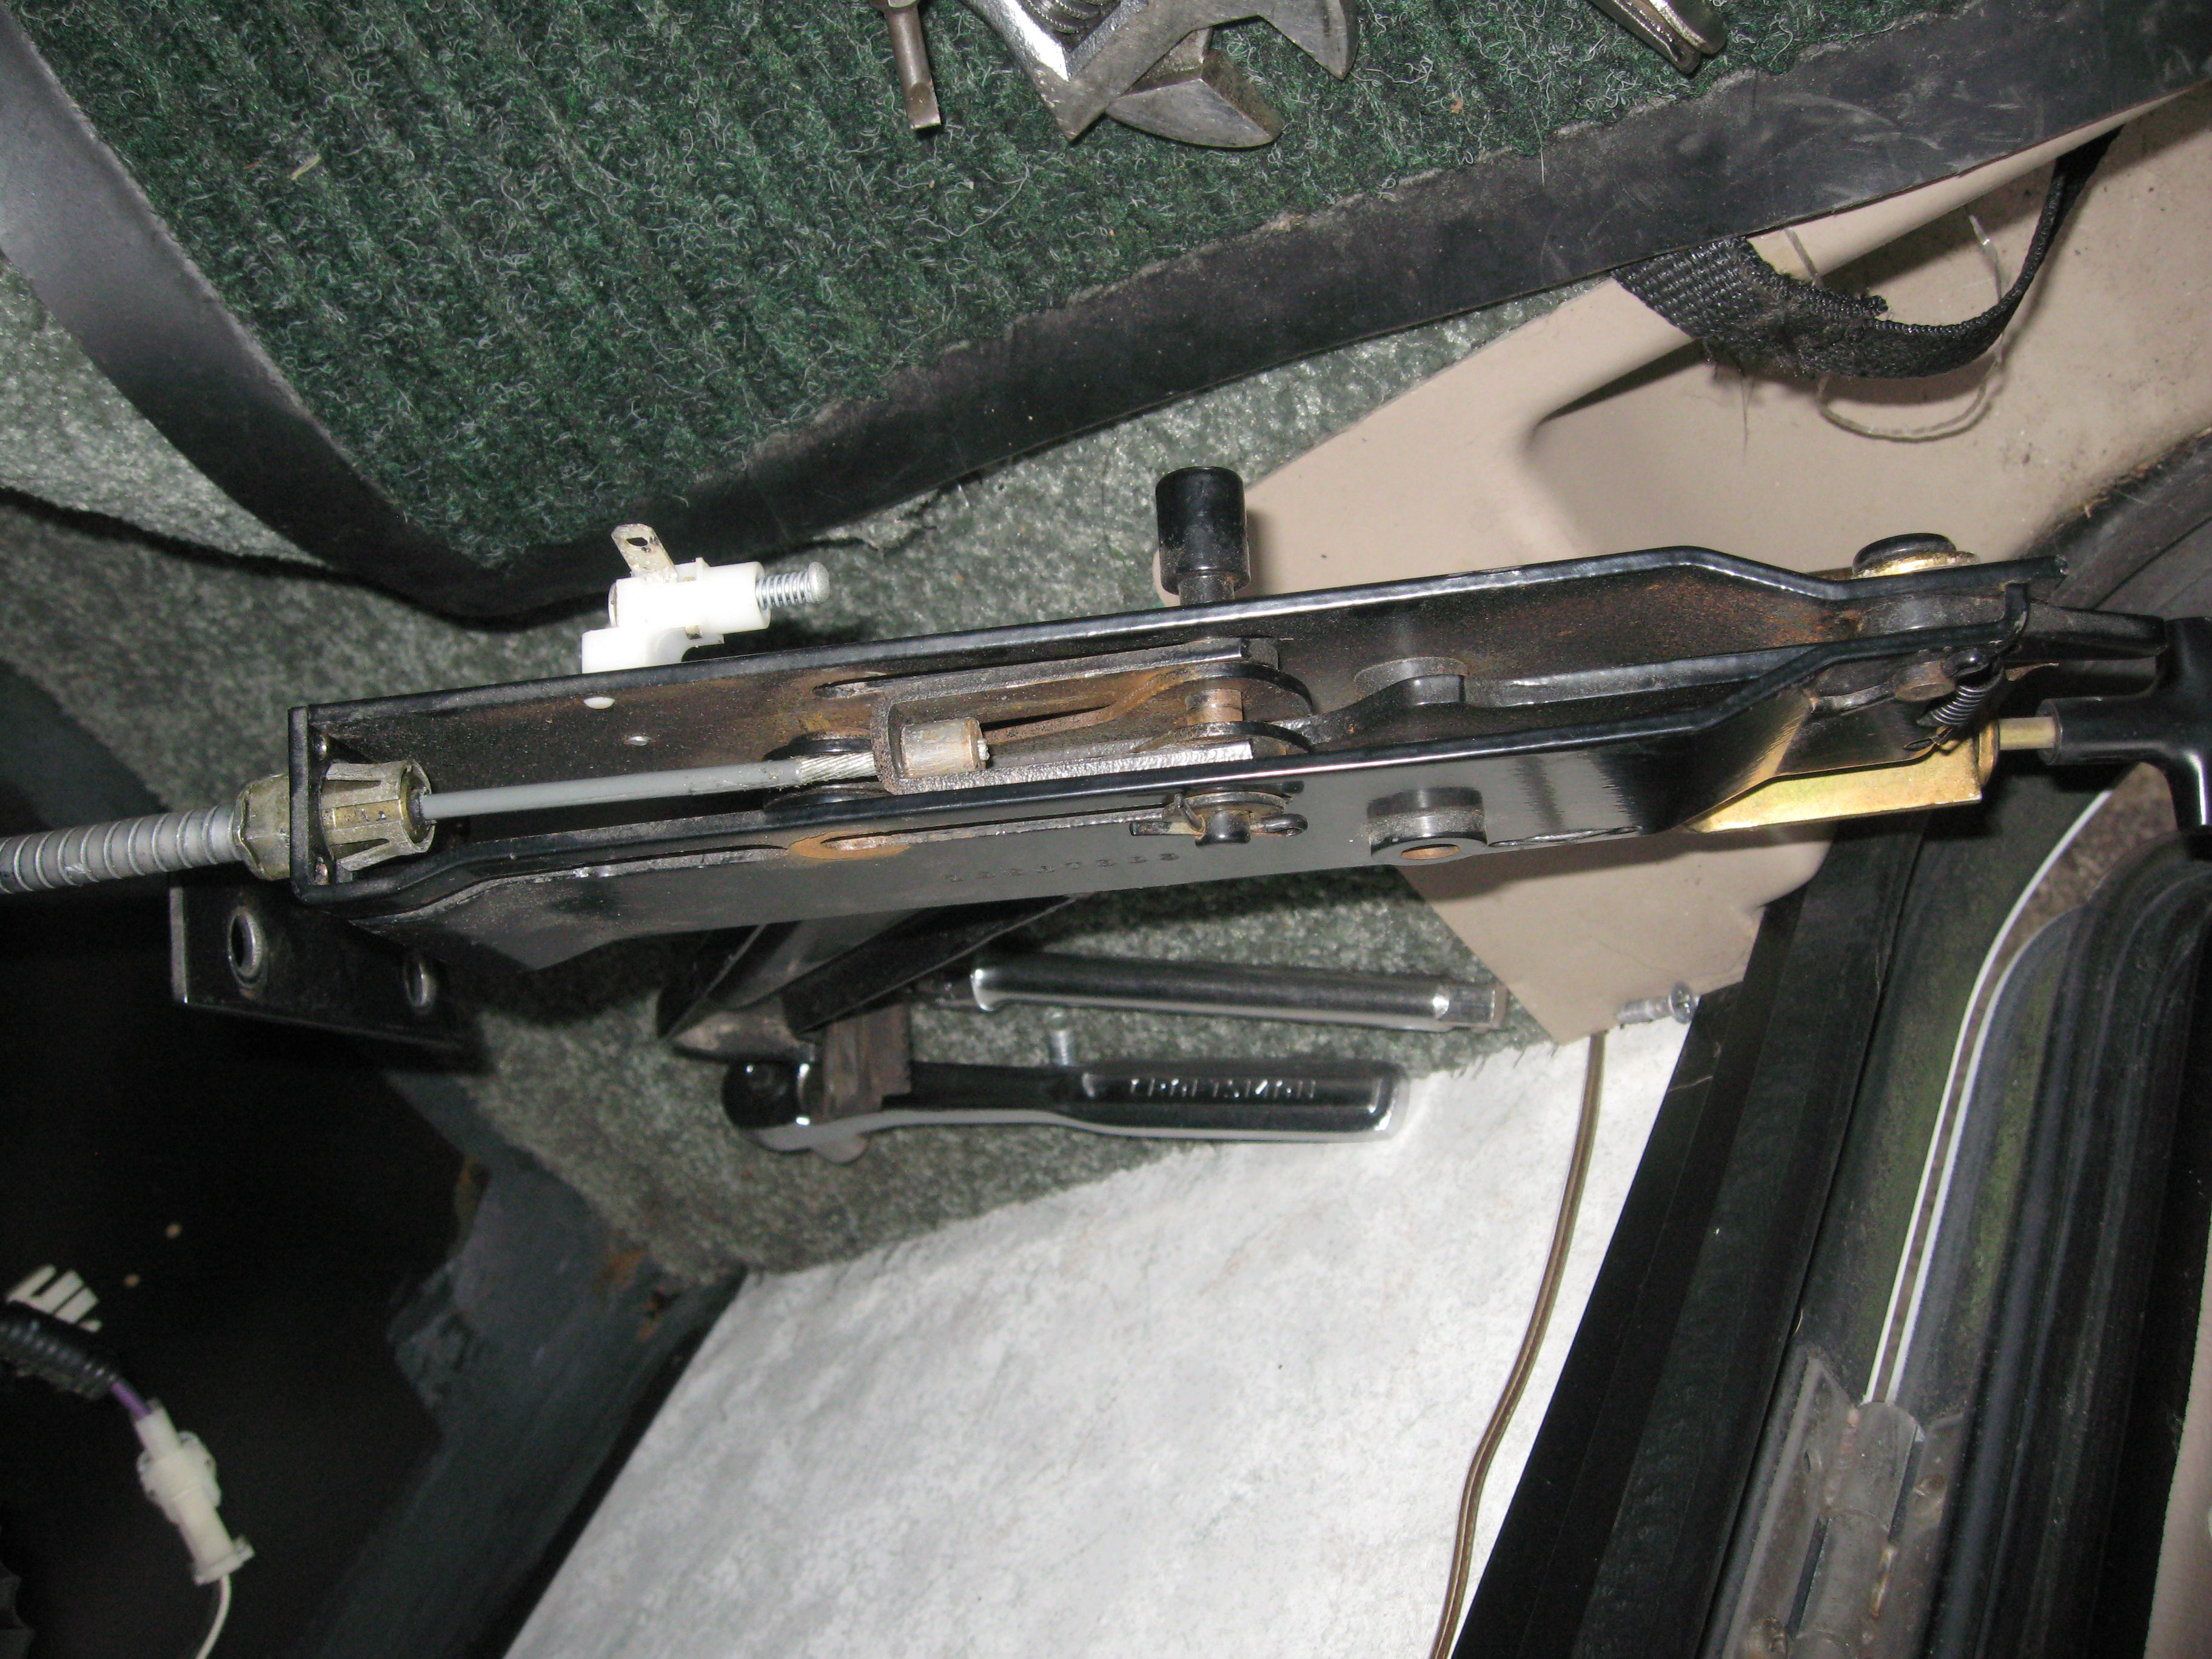
Your first question might be, "How do I defeat the auto parking brake so I can get home?" Under the driver's side of the motorhome, just back from the driver's door, on the inside of the frame rail, is a mechanism called a relay lever. It is here the cables from the parking brake pedal and the auto park meet. They pull a lever which causes one cable that goes back to the drum brake to apply the parking brake.
Rumor is, you remove the cotter pin and bang out the clevis pin to release the brake. Problem is, I can't see how that can be done. The clevis pin is against the structure and can't be removed. The whole mess can be unbolted, dropped and then the clevis might be accessible, but you aren't going to remove that clevis pin while it is attached to the frame.
Note that when you do release the pin, the motorhome will not have any parking brake. There is no transmission pawl. The transmission might as well be in neutral. If you release the brake while under the motorhome, an another person isn't pressing hard on the brake pedal, the motorhome could/will roll. It will take off in whatever direction the laws of gravity decide. I don't fit under my box. I'd have to put it on ramps or jack it up. The parking brake being released, the motorhome would then proceed to drive over me. Chocking the wheels or, better, someone with their foot on the wheel brake would be a really good idea.
How it works
There are a number of separate units that make up the brake:
1. The drum brake on the back of the transmission. If you want to work on this, find someone else to describe it. You have to drop the driveshaft and I haven't done that.
2. The cable and relay lever
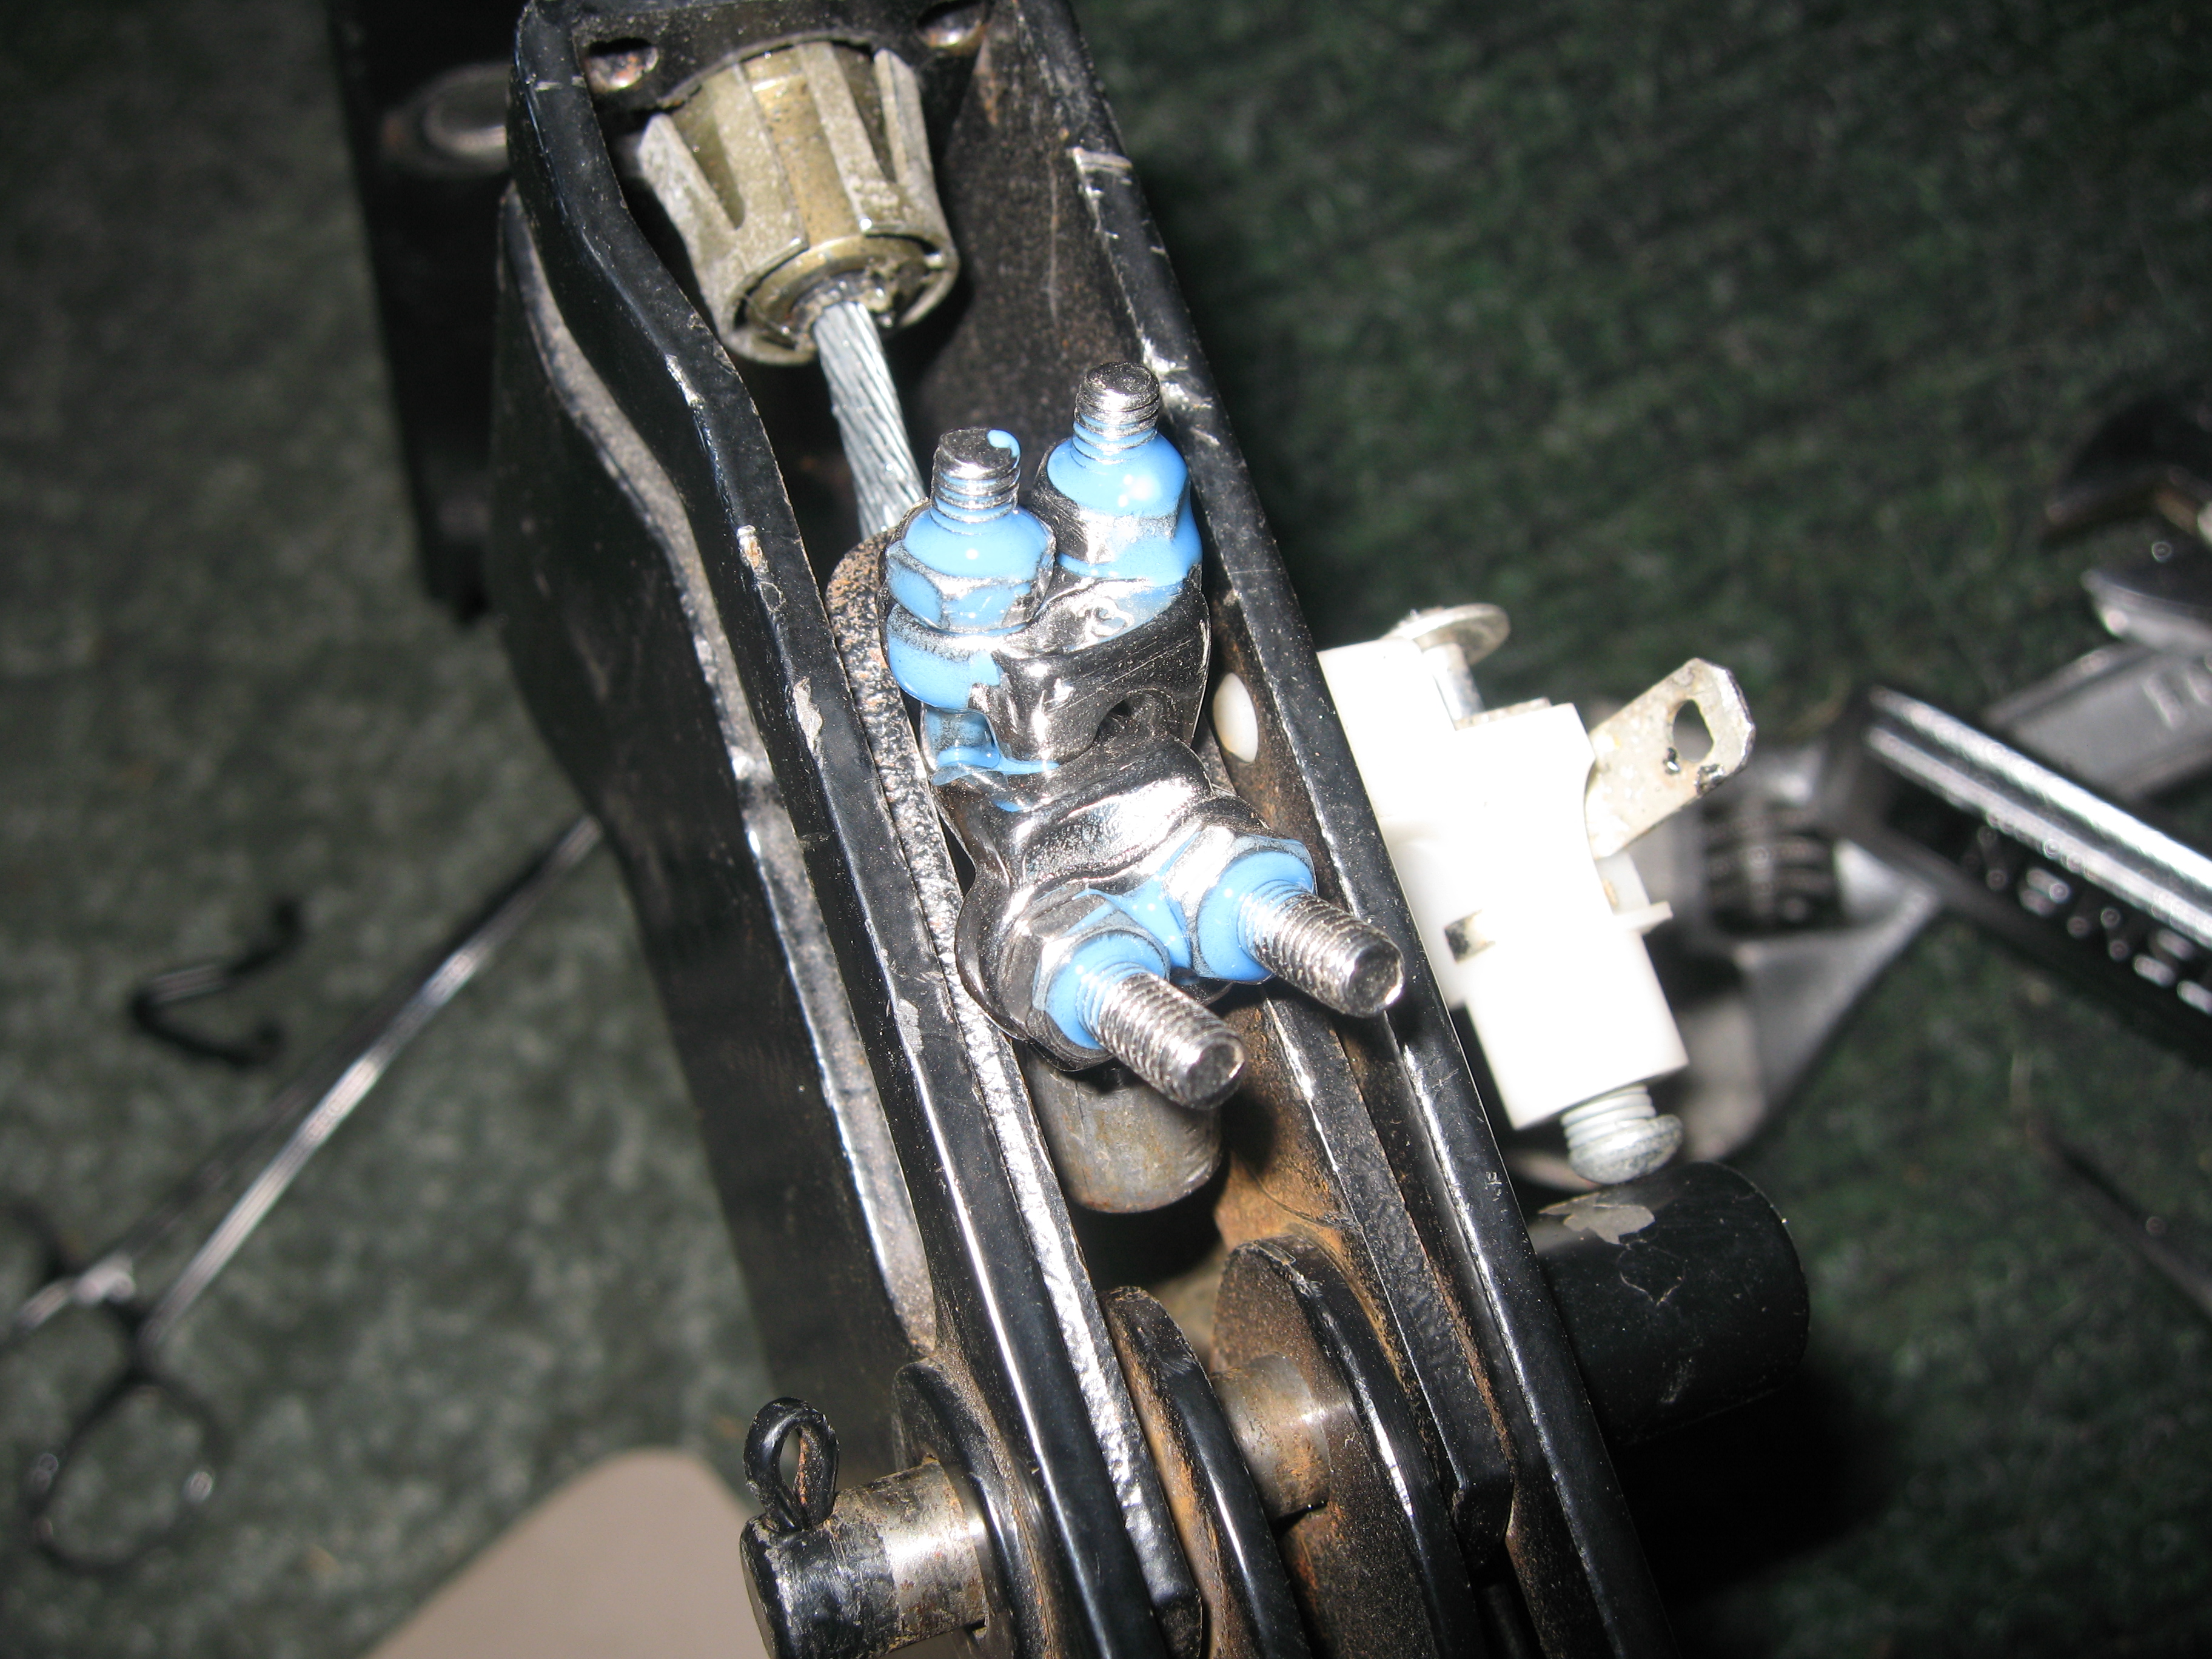
3. The actuator. This is a hydraulic cylinder that contains a large spring that when the pressure is released, pulls the cable and applies the brake. When it is pressurized, the actuator releases the cable allowing the brake to release. If there are no leaks, this is the last part to replace in an attempt to fix a cycling pump.
4. The pump unit. The pump unit has a pump, reservoir for Dextron III automatic transmission fluid and the bastard "ugly green switch". The bastard ugly green switch is a switch that tells the pump there is enough pressure in the system and it can turn off. This is an often failed part and a good place to start when nothing appears to be leaking.
5. The solenoid valve. The solenoid valve operates to release the pressure in the system when the unit is in park. If you have no leaks, this might be leaking internally. This is the second thing to replace when there are no leaks.
Where it is
These devices are in an armored box on the inside of the frame rail on the passenger's side of the coach. Good luck. Take goggles. You remove a handful of testy bolts to remove a heavy cover that, upon loosening the last bolt, swings down like some sort of Halloween prank, except this one can hurt you. Now you can see the various parts and compare them with the figures in the manual. No manual? Put the plate back in place and find a mechanic.
First the parking brake pedal
My parking brake pedal was soft. The cable needed to be tightened up. Were the rig new, I could adjust it at the relay lever, Deftly popping the clevis pin out (good luck with that as the clevis is behind the structure and isn't coming out) would work to free the cable and allow adjustment there. However, after twelve years in the salt and slush it wasn't looking amiable to being messed with. I chose to pull about an inch back at the parking brake pedal. I did this by inserting two 3/32 inch cable clamps in front of the cable end. I bought these at Home Depot. I depressed the cable, captured the cable by the shield using a pair of needle-nosed vice grips and then released the pedal. I could then insert the cable clamps. Afterward, the pedal was just right for properly applying the pedal parking brake.
My problem
 At
34,749 miles my auto park light started blinking. In checking under the chassis, I
found that both the actuator and pump was leaking. It appeared to be about
$1000 in parts. No, it wasn't the RGS, the "rotten green switch", that
often fails. I needed a new or rebuilt pump and a new or rebuilt actuator.
Not willing to throw that much money at the thing, and having the parking brake
pedal as a perfectly good redundant system, I disconnected the automatic job and
abandoned it.
At
34,749 miles my auto park light started blinking. In checking under the chassis, I
found that both the actuator and pump was leaking. It appeared to be about
$1000 in parts. No, it wasn't the RGS, the "rotten green switch", that
often fails. I needed a new or rebuilt pump and a new or rebuilt actuator.
Not willing to throw that much money at the thing, and having the parking brake
pedal as a perfectly good redundant system, I disconnected the automatic job and
abandoned it.
One can disconnect it by popping the clevis pin out of the relay lever. Good luck. The clevis is behind the structure that holds the relay lever. You can't beat it out. Don't care what your mechanic said he did. I did talk to one P-30 owner that reported he pried the relay lever and managed to get the clevis pin out. Phooey.
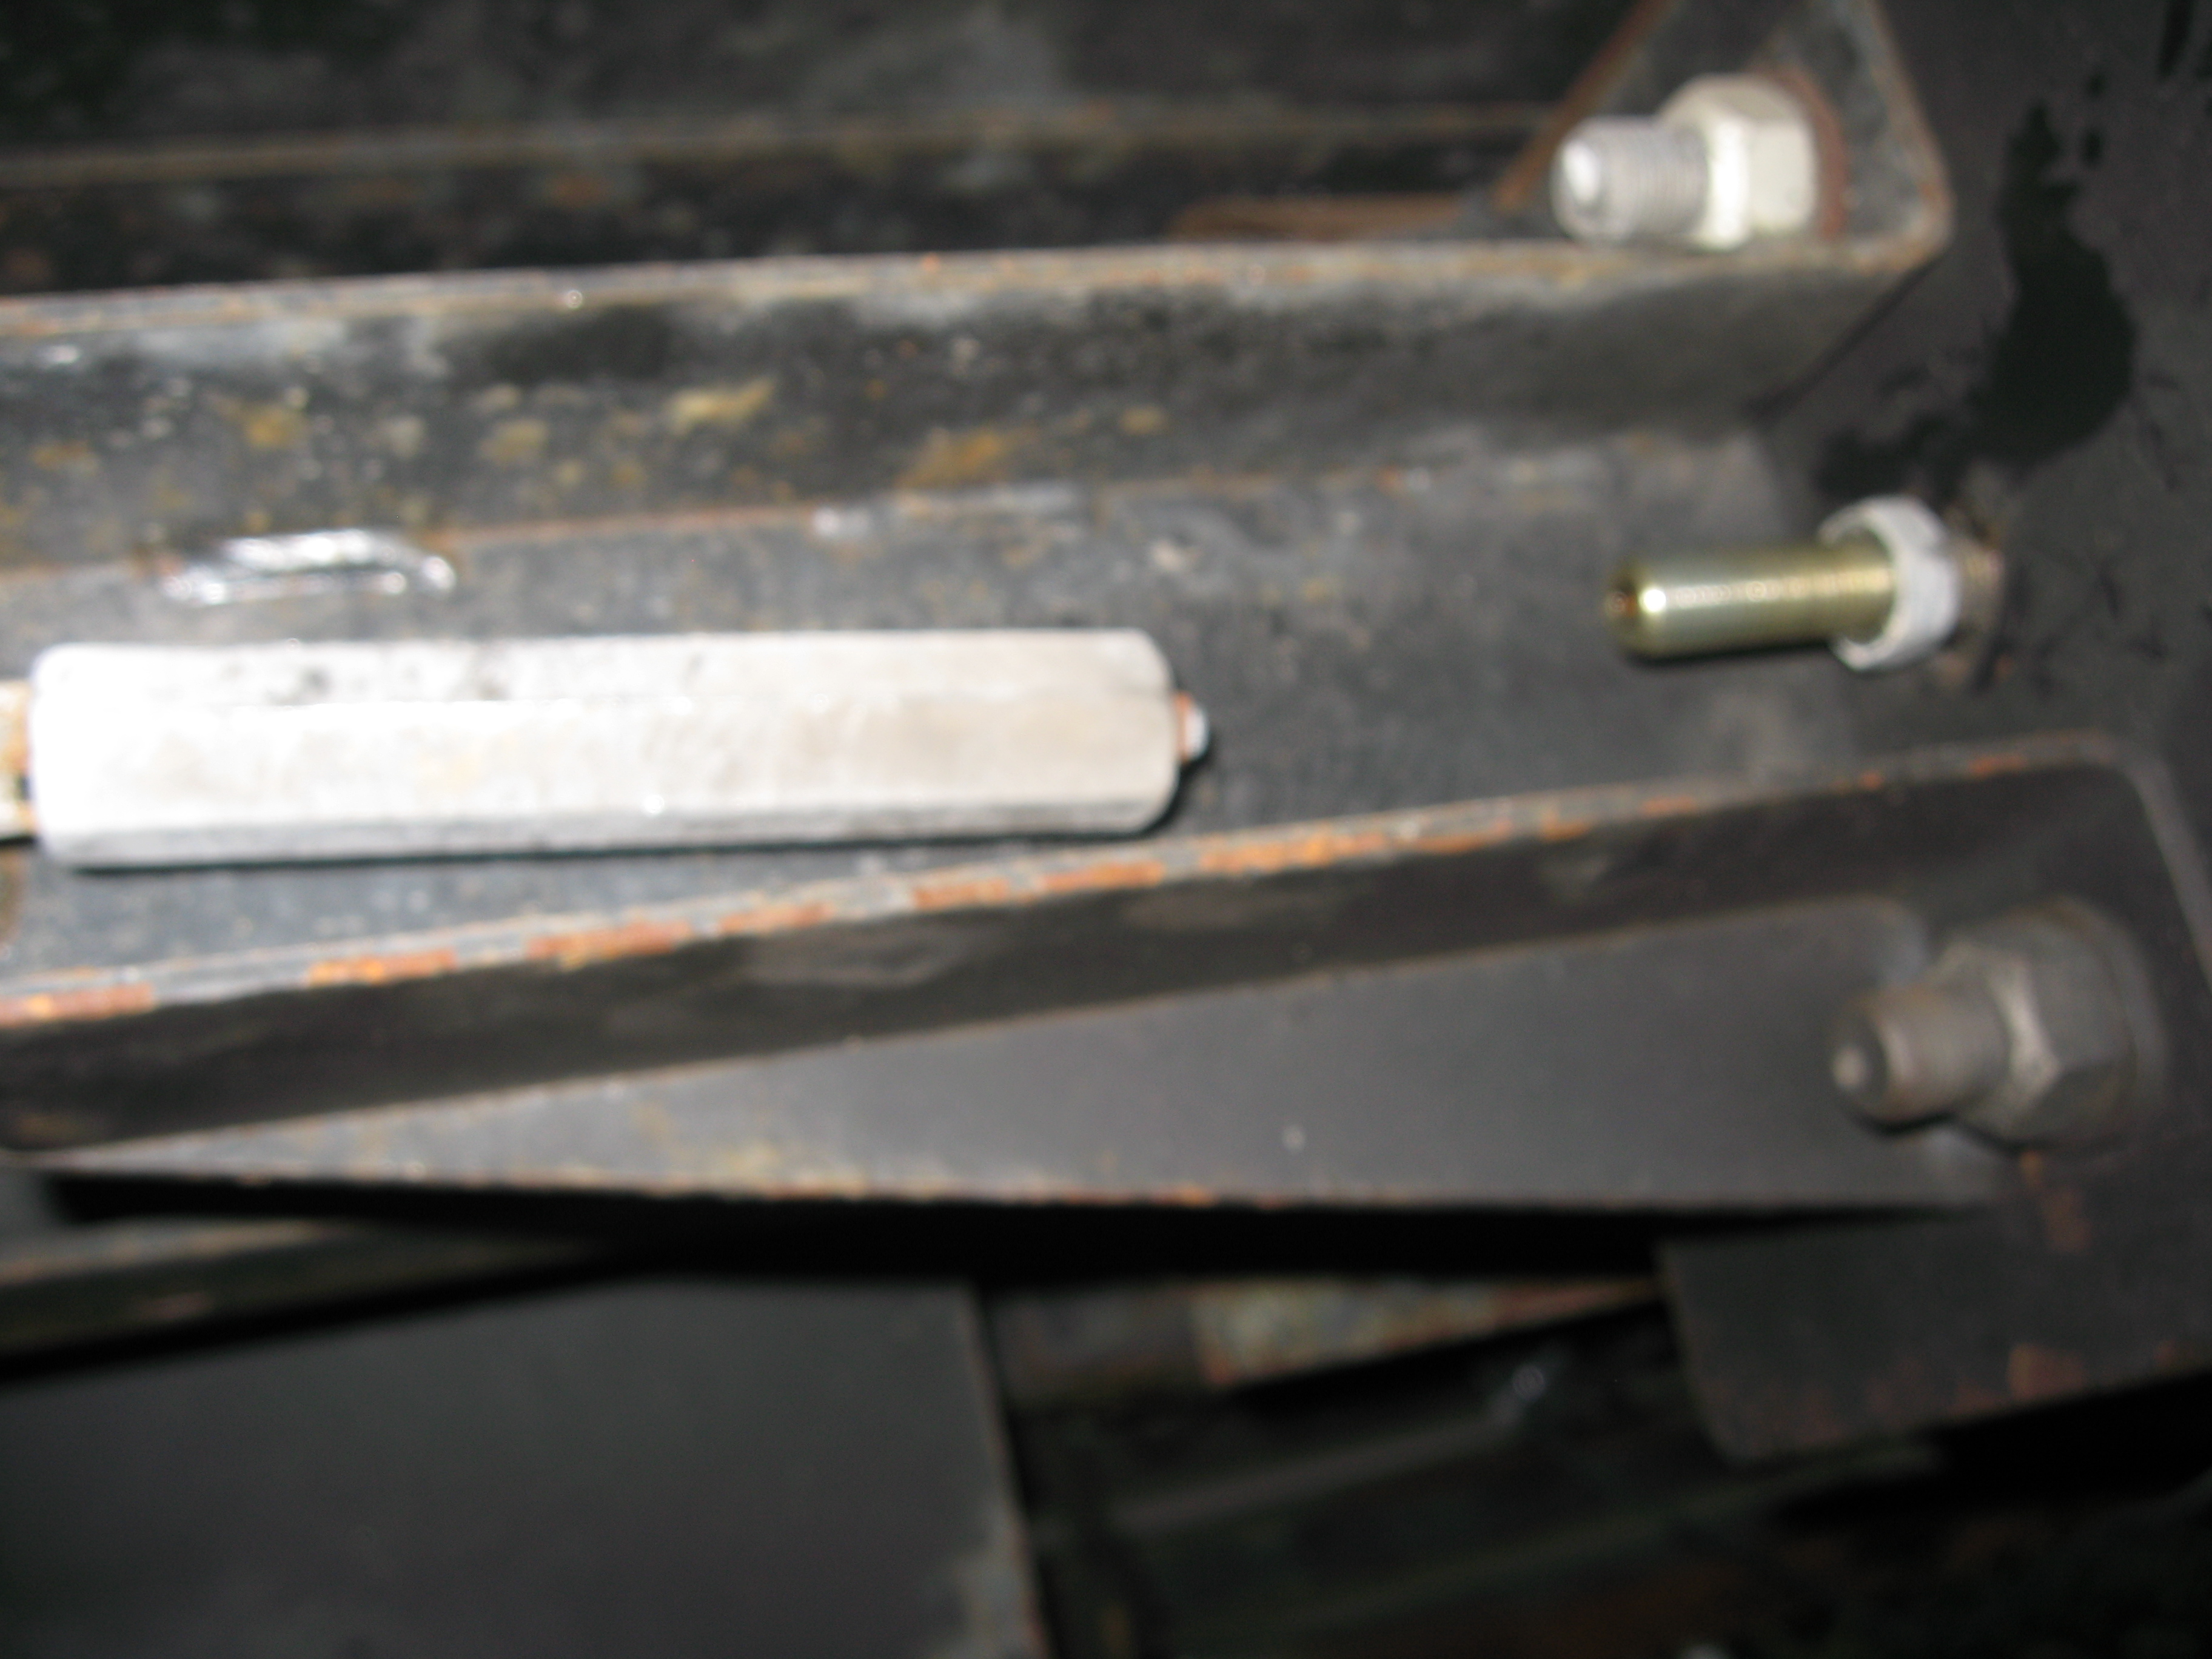
I unscrewed the cable-to-actuator nut. Simple.
Easy. Sorry the picture isn't in good focus. I'd crawl back under
there but I don't have it in me. I grabbed the brake cable with a pair of
vise grips. I grabbed the jam nut with a wrench and freed it. I
grabbed the big actuator-to-cable nut and unscrewed it. Easy.
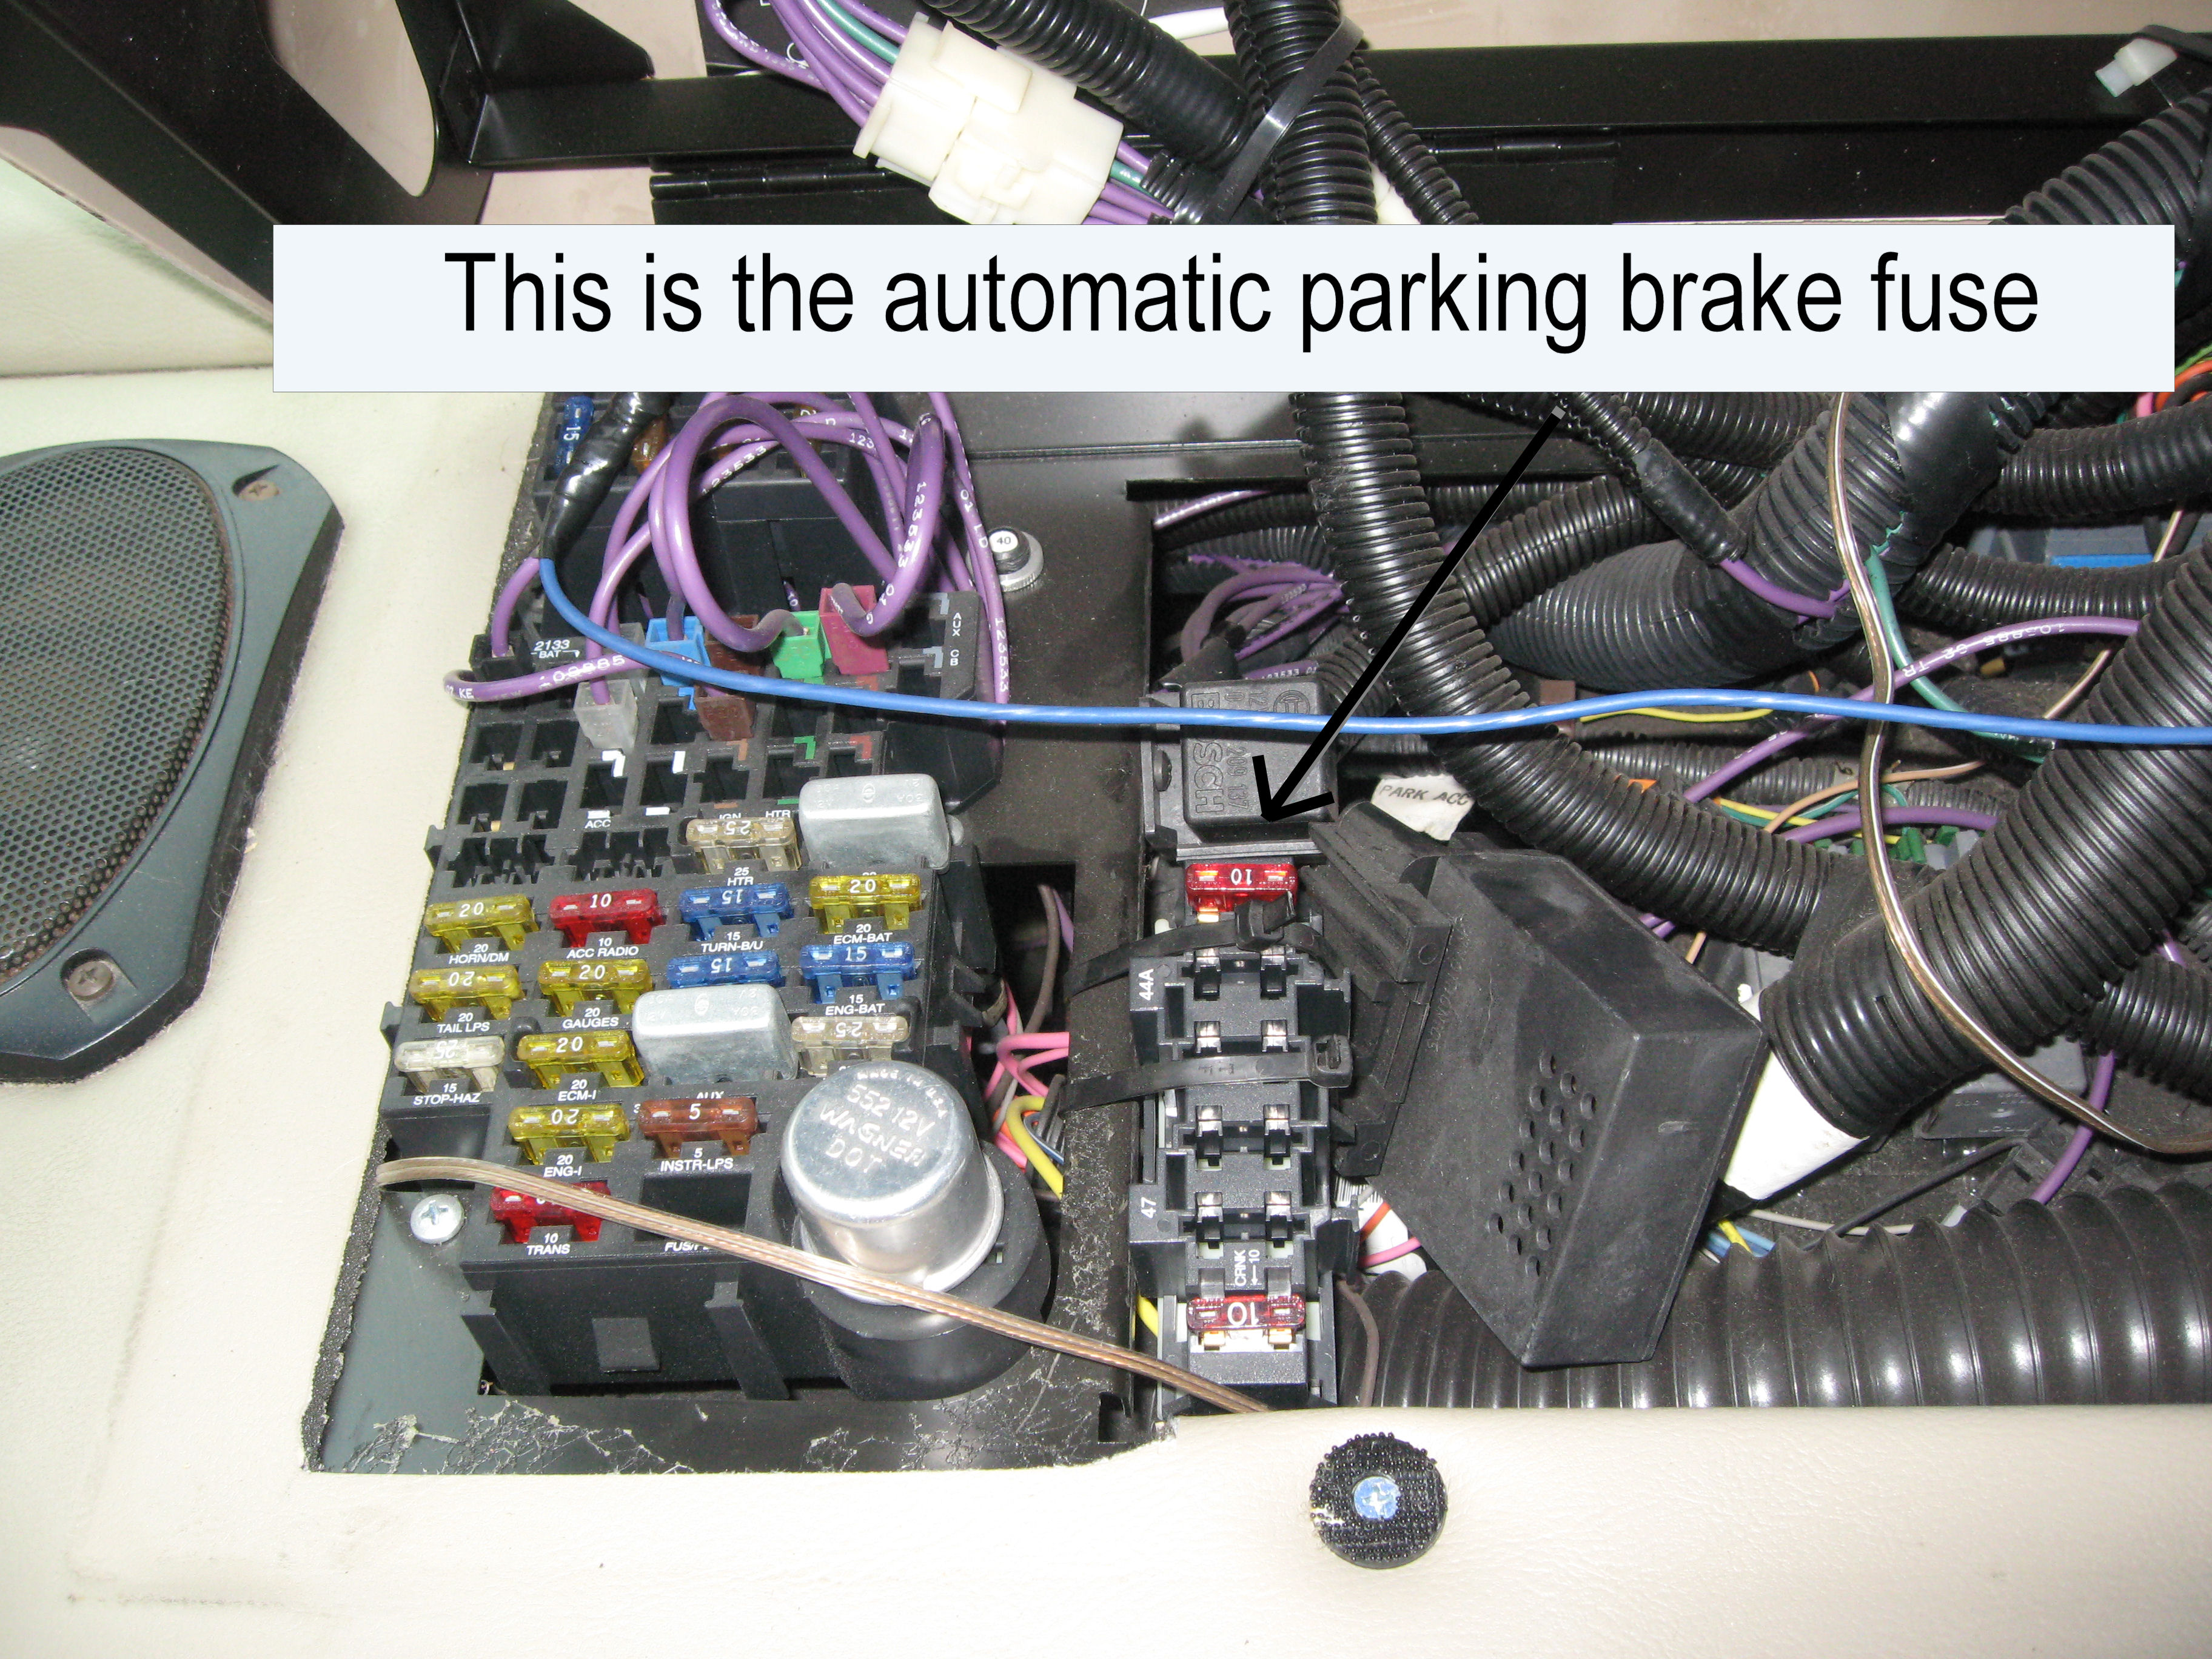 Once
disconnected, you'll want to pull the fuse that controls the automatically
applied parking brake.
Once
disconnected, you'll want to pull the fuse that controls the automatically
applied parking brake.
If you are anal, you'll also want to disconnect the power from the battery junction block under the hood. It isn't necessary but if you're anal, you'll have to do it.
The problem is forgetting to set the foot pedal parking
brake when parking could allow the box to leave without me. You need an
alarm.
The alarm
The alarm does two things. First, a Sonalert beeps away. That's quite loud. In addition, there is a small yellow strobe light, marked "PARKING BRAKE PROBLEM" that begins to flash. It flashes in two instances:
1. When in park and the parking brake pedal has not been engaged.
2. When not in park and the parking brake pedal is engaged.
So you can't park the rig without being notified that you need to apply the parking brake.
So you can't leave after being parked with the parking brake engaged.
Further, there is a third function:
3. If you have your foot on the brakes, the alarm is turned off.
Here is a short video showing the alarm in action: In WMV or in MPG formats.
Schematic
First, the larger schematic. You can also click on this and another, larger schematic will be provided:
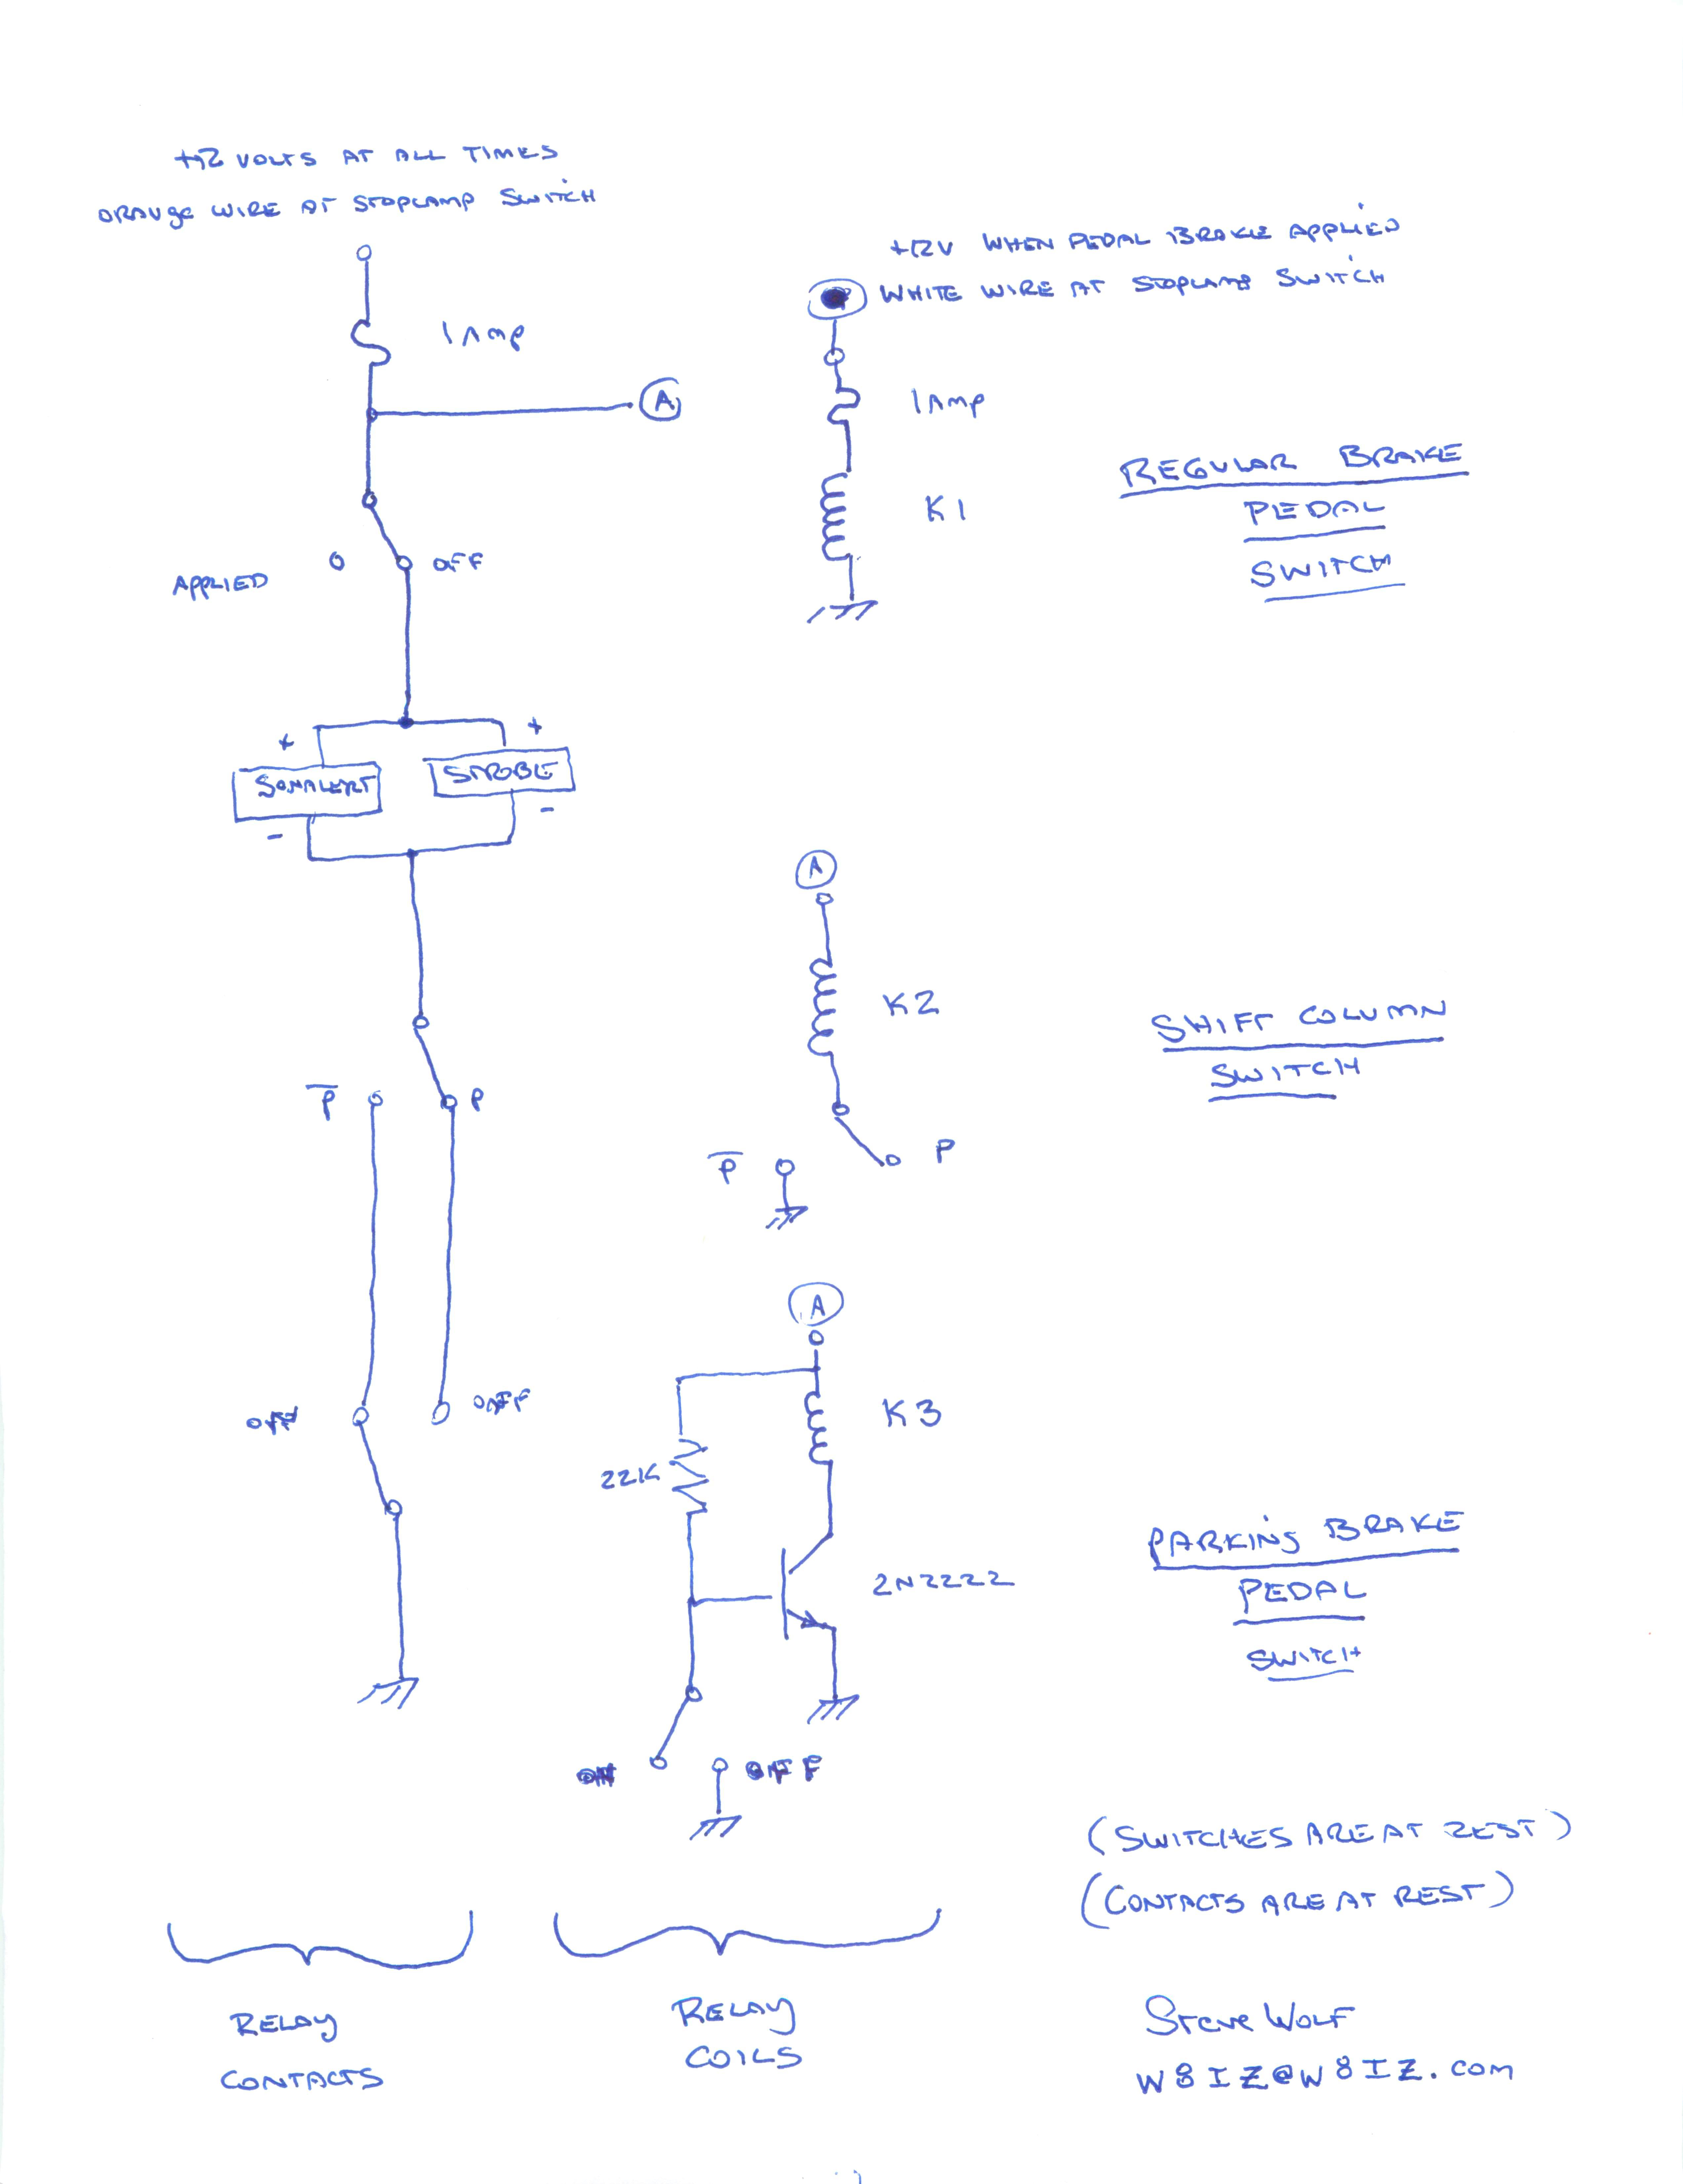

To the left is a smaller version of the schematic. Let's take each relay one by one.
The first relay turns off power to the alarm when the regular brake pedal is pressed. That means that while you have your foot on the brake, the alarm will not sound. This allows me to set or release the brake without worrying about the alarm. I just keep my foot on the brake. It is powered from the white wire at the stoplight switch. There's a picture later.
The second relay toggles based on whether I am in park or not in park.
The third relay is the bugger. It is toggled by the
parking brake pedal. There is a switch mounted on the parking brake pedal
that connects to ground when the pedal is released; when the brake is off.
My original version had this relay connected right to that switch. The
problem is, at rest, that is, in park with the parking brake on, the system
would be drawing the 70 milliamp coil current. Not a problem when plugged
in but why waste power when dry camping? So the relay has a simple NPN
switch to turn it on and off. I neglected to wire in a diode across the
relay contacts. In some applications the current through the relay coil
can induce a voltage that can destroy the transistor. Maybe. With a
large actuator. With these relays, not so much. Now at rest I draw
about a half a milliamp, about 500 microamps. Cool beans!
So power goes to the alarms only if you are off the regular stopping brake AND
You either:
Have the motorhome in park with the parking brake off
OR
You have the motorhome in gear or in neutral with the parking brake on.
Voila!
Parts
These are the parts I used:
One Radio Shack 273-0066 12 volt DC Sonalert
Three Radio Shack 276-206 12 volt DC DPDT relays
One Vellman HAA40 amber strobe obtained from All Electronics, their catalog number is STROBE-3As
A 2N2222 type NPN switching transistor
A 22k resistor
A project box to hold the relays and wiring
Wire, solder, etc.
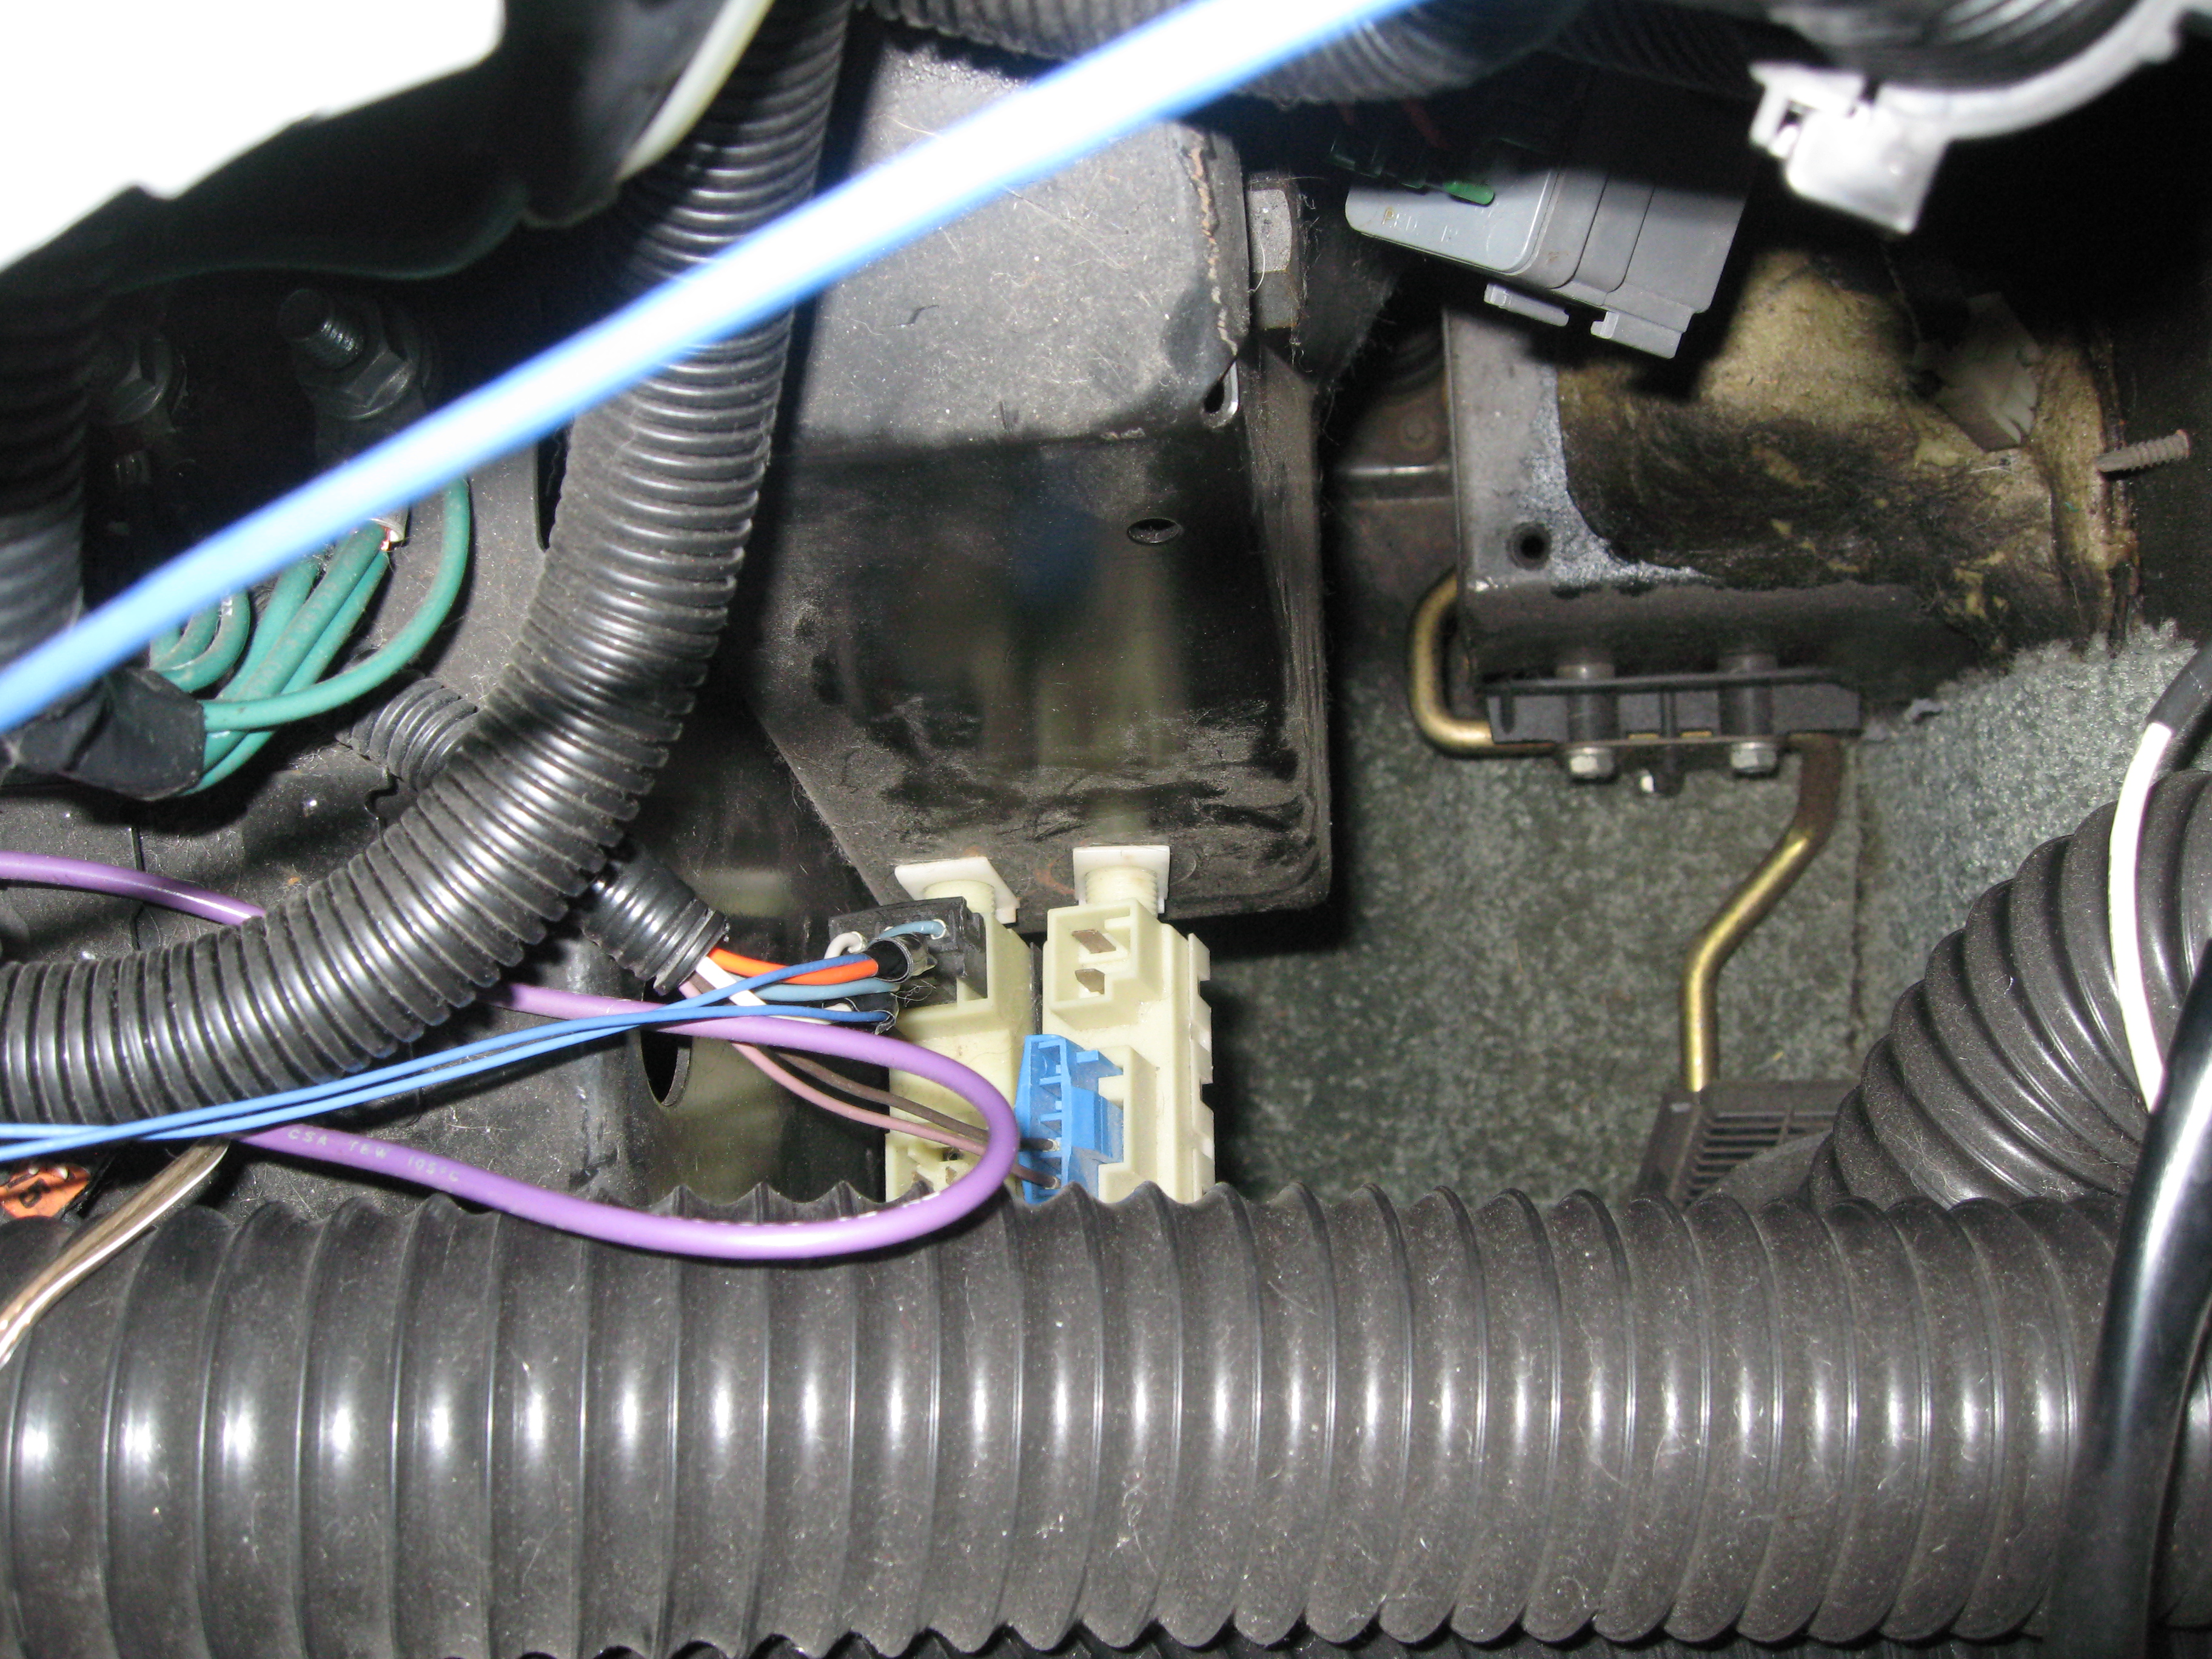
 The
Shift Column Switch
The
Shift Column Switch
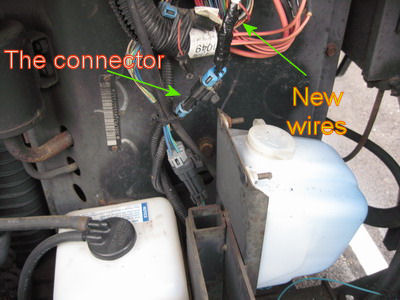
Now you need to locate the connector under the hood that leads to the shift column switch. This switch is open in park and closed at all other times. I reused the existing connector, cutting off the pink and yellow/black wires a bit back from the plug. I taped and secured those wires. I then connected two new wires to the plug and plugged it in.
Running the new wires into the passenger compartment
I then drilled a hole next to the battery junction block into the passenger compartment. I stuffed some large-walled plastic tubing into the hole and then routed the new wires into the passenger compartment.

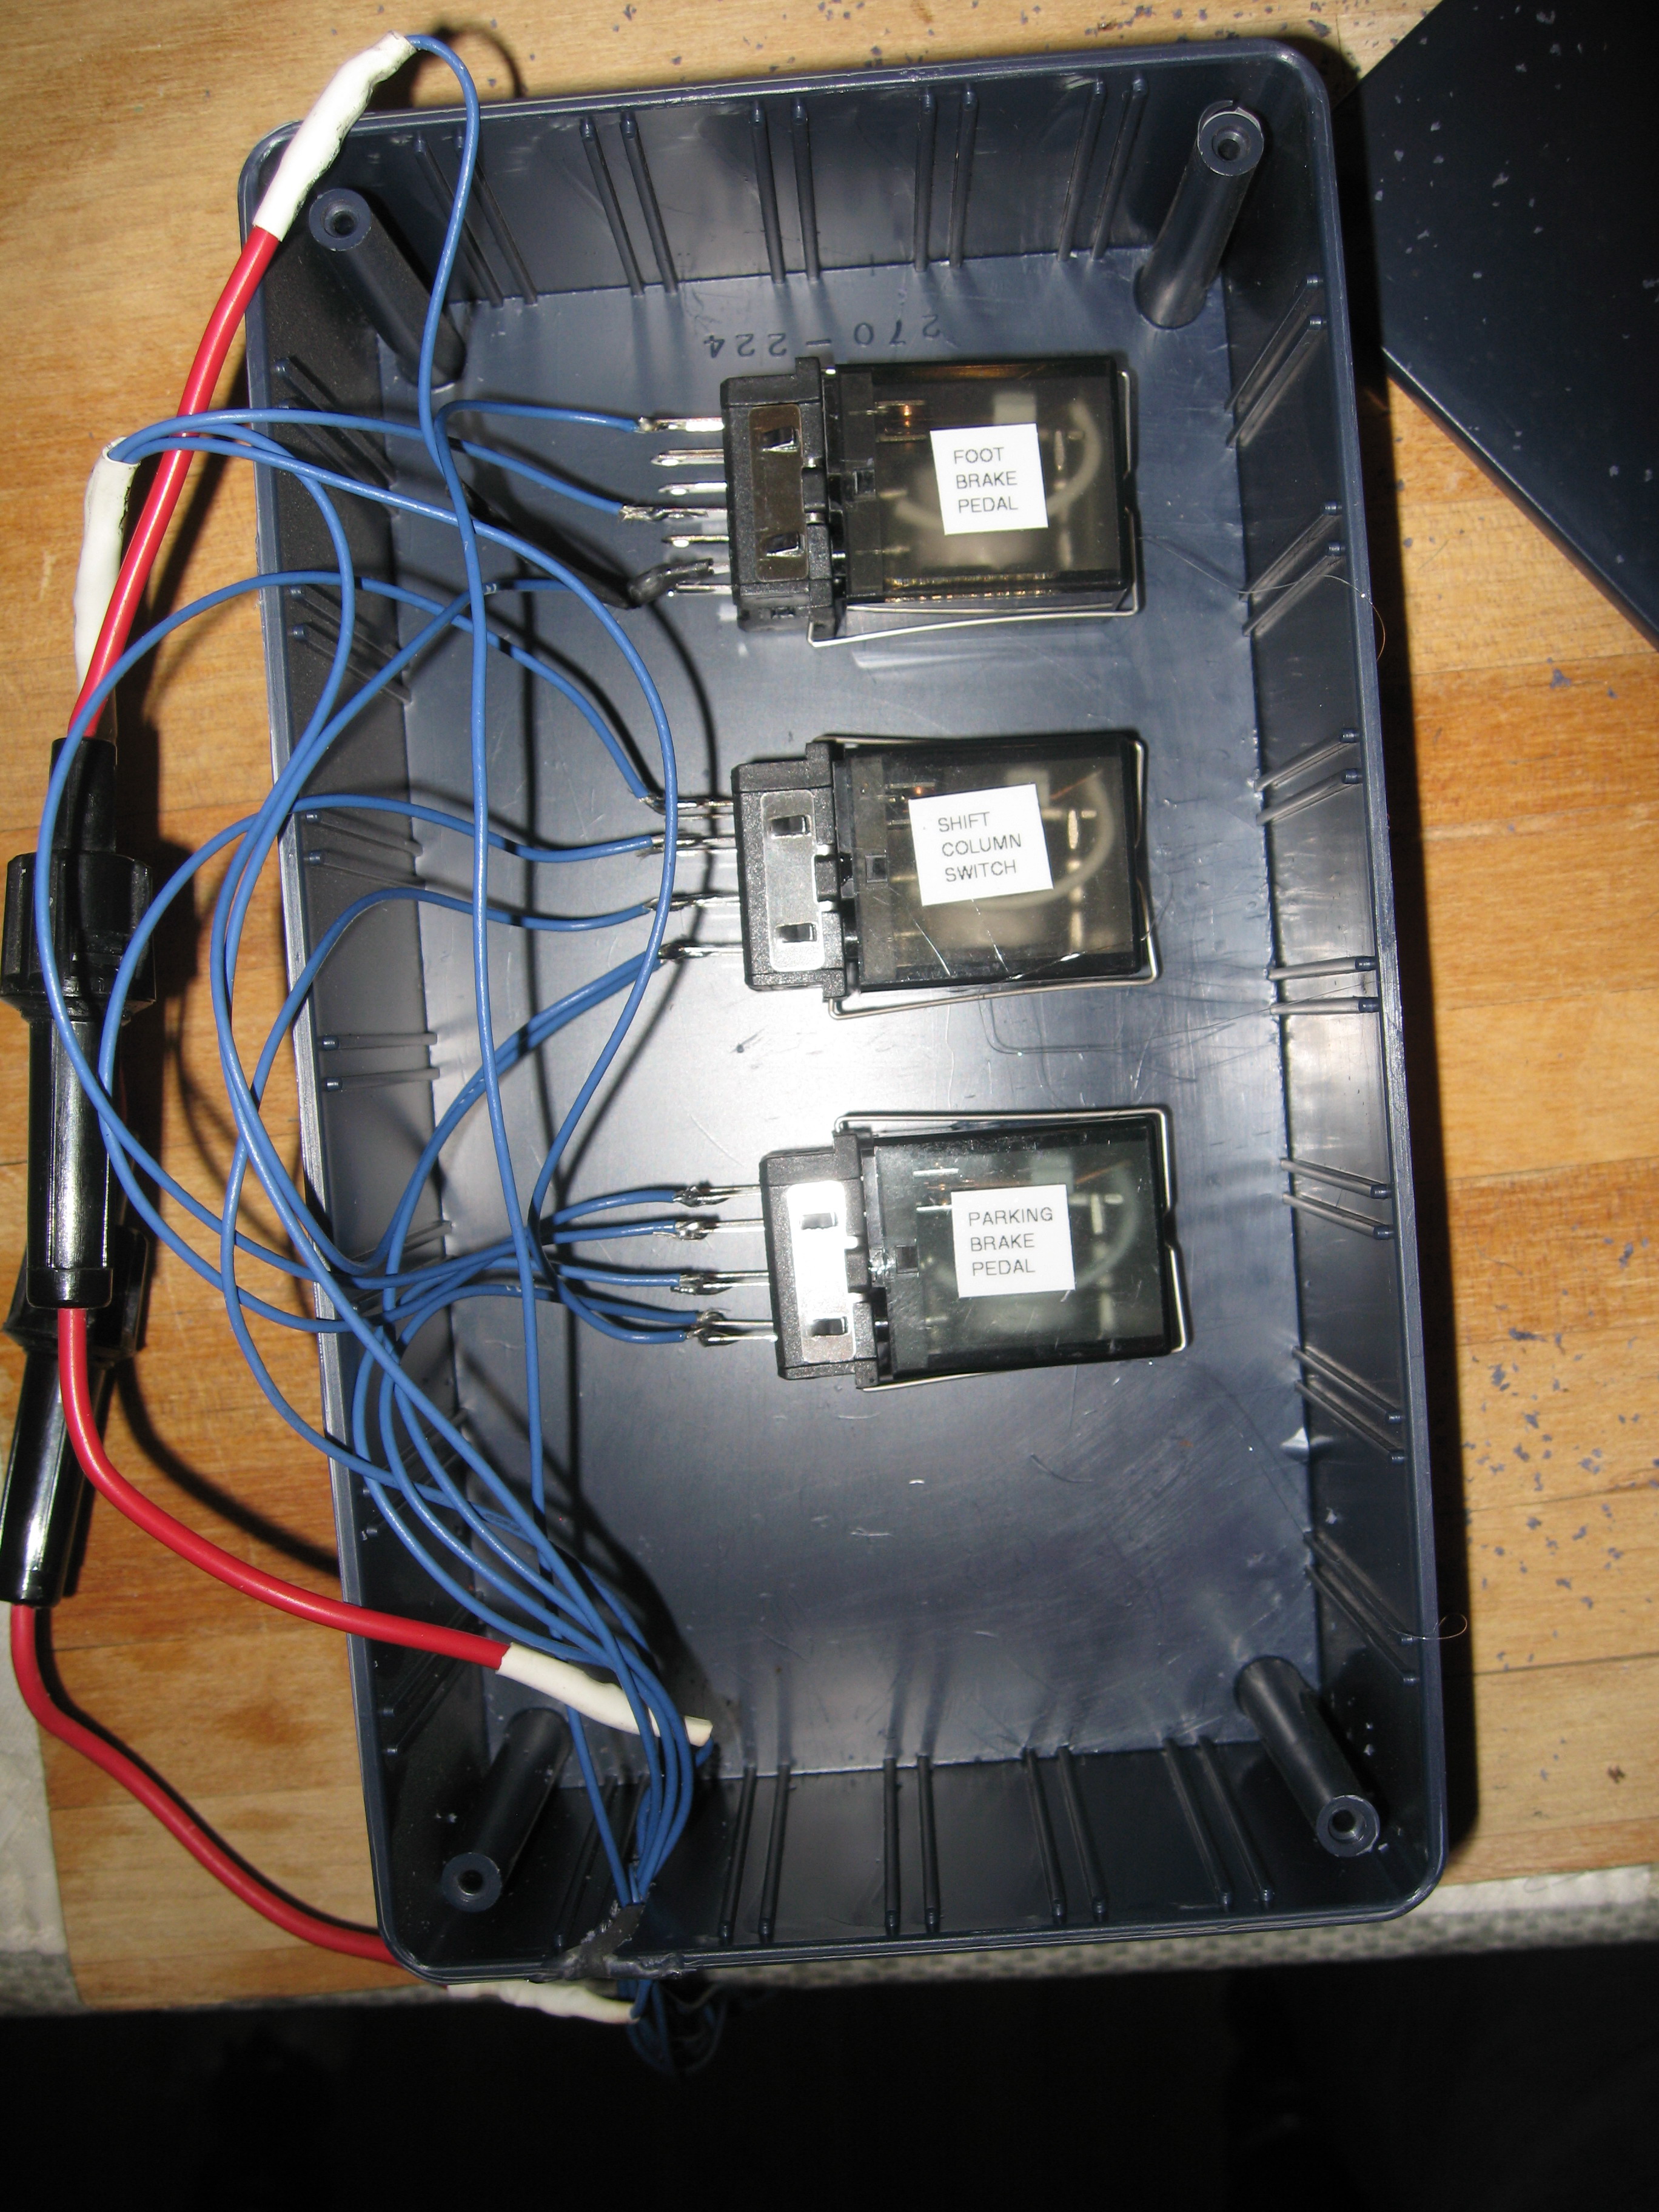 The
Relay Box
The
Relay Box
I used a Radio Shack plastic project box to hold the relays which were glued to the back of the box. I Dremmelled a slot and used glue to secure the wires exiting the box. I built the transistor switch on a small piece of perf board, taped it all up and placed that in the box.
The Stop Lamp Switch
The stop lamp switch can be seen by toggling the dashboard forward and looking to the left of the gas pedal.
Installation
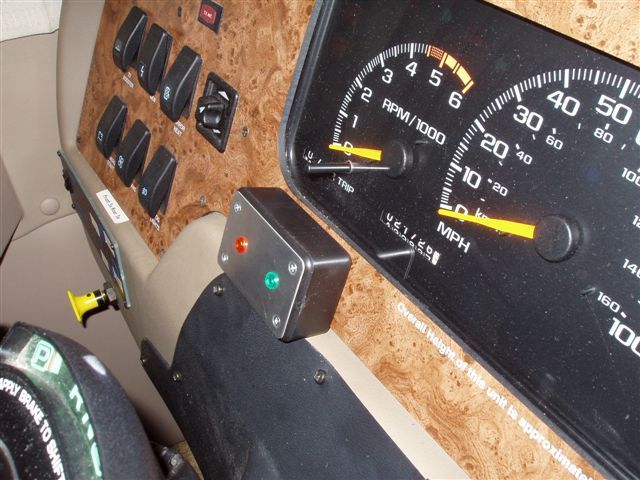
I mounted the strobe to the left of the column and zip tied the whole thing under the dash.
Problem solved. Works great.
Again, the video:
Here is a short video showing the alarm in action: In WMV or in MPG formats.
Below I have archived a number of pieces from other sources here on my web site:
Auto Park info master sheet.pdf
Convert auto-park brake to manual lever info.pdf
Park Brake parts list by Tropi Cal.pdf
Park brake-Genie Lamp Package.pdf
ParkBrake genie lamp module picture
PUMP MOTOR SWITCH..RGS...replacement.pdf
THIS IS A PDF FILE OF THIS WEBSITE (why do I feel loopy?)
